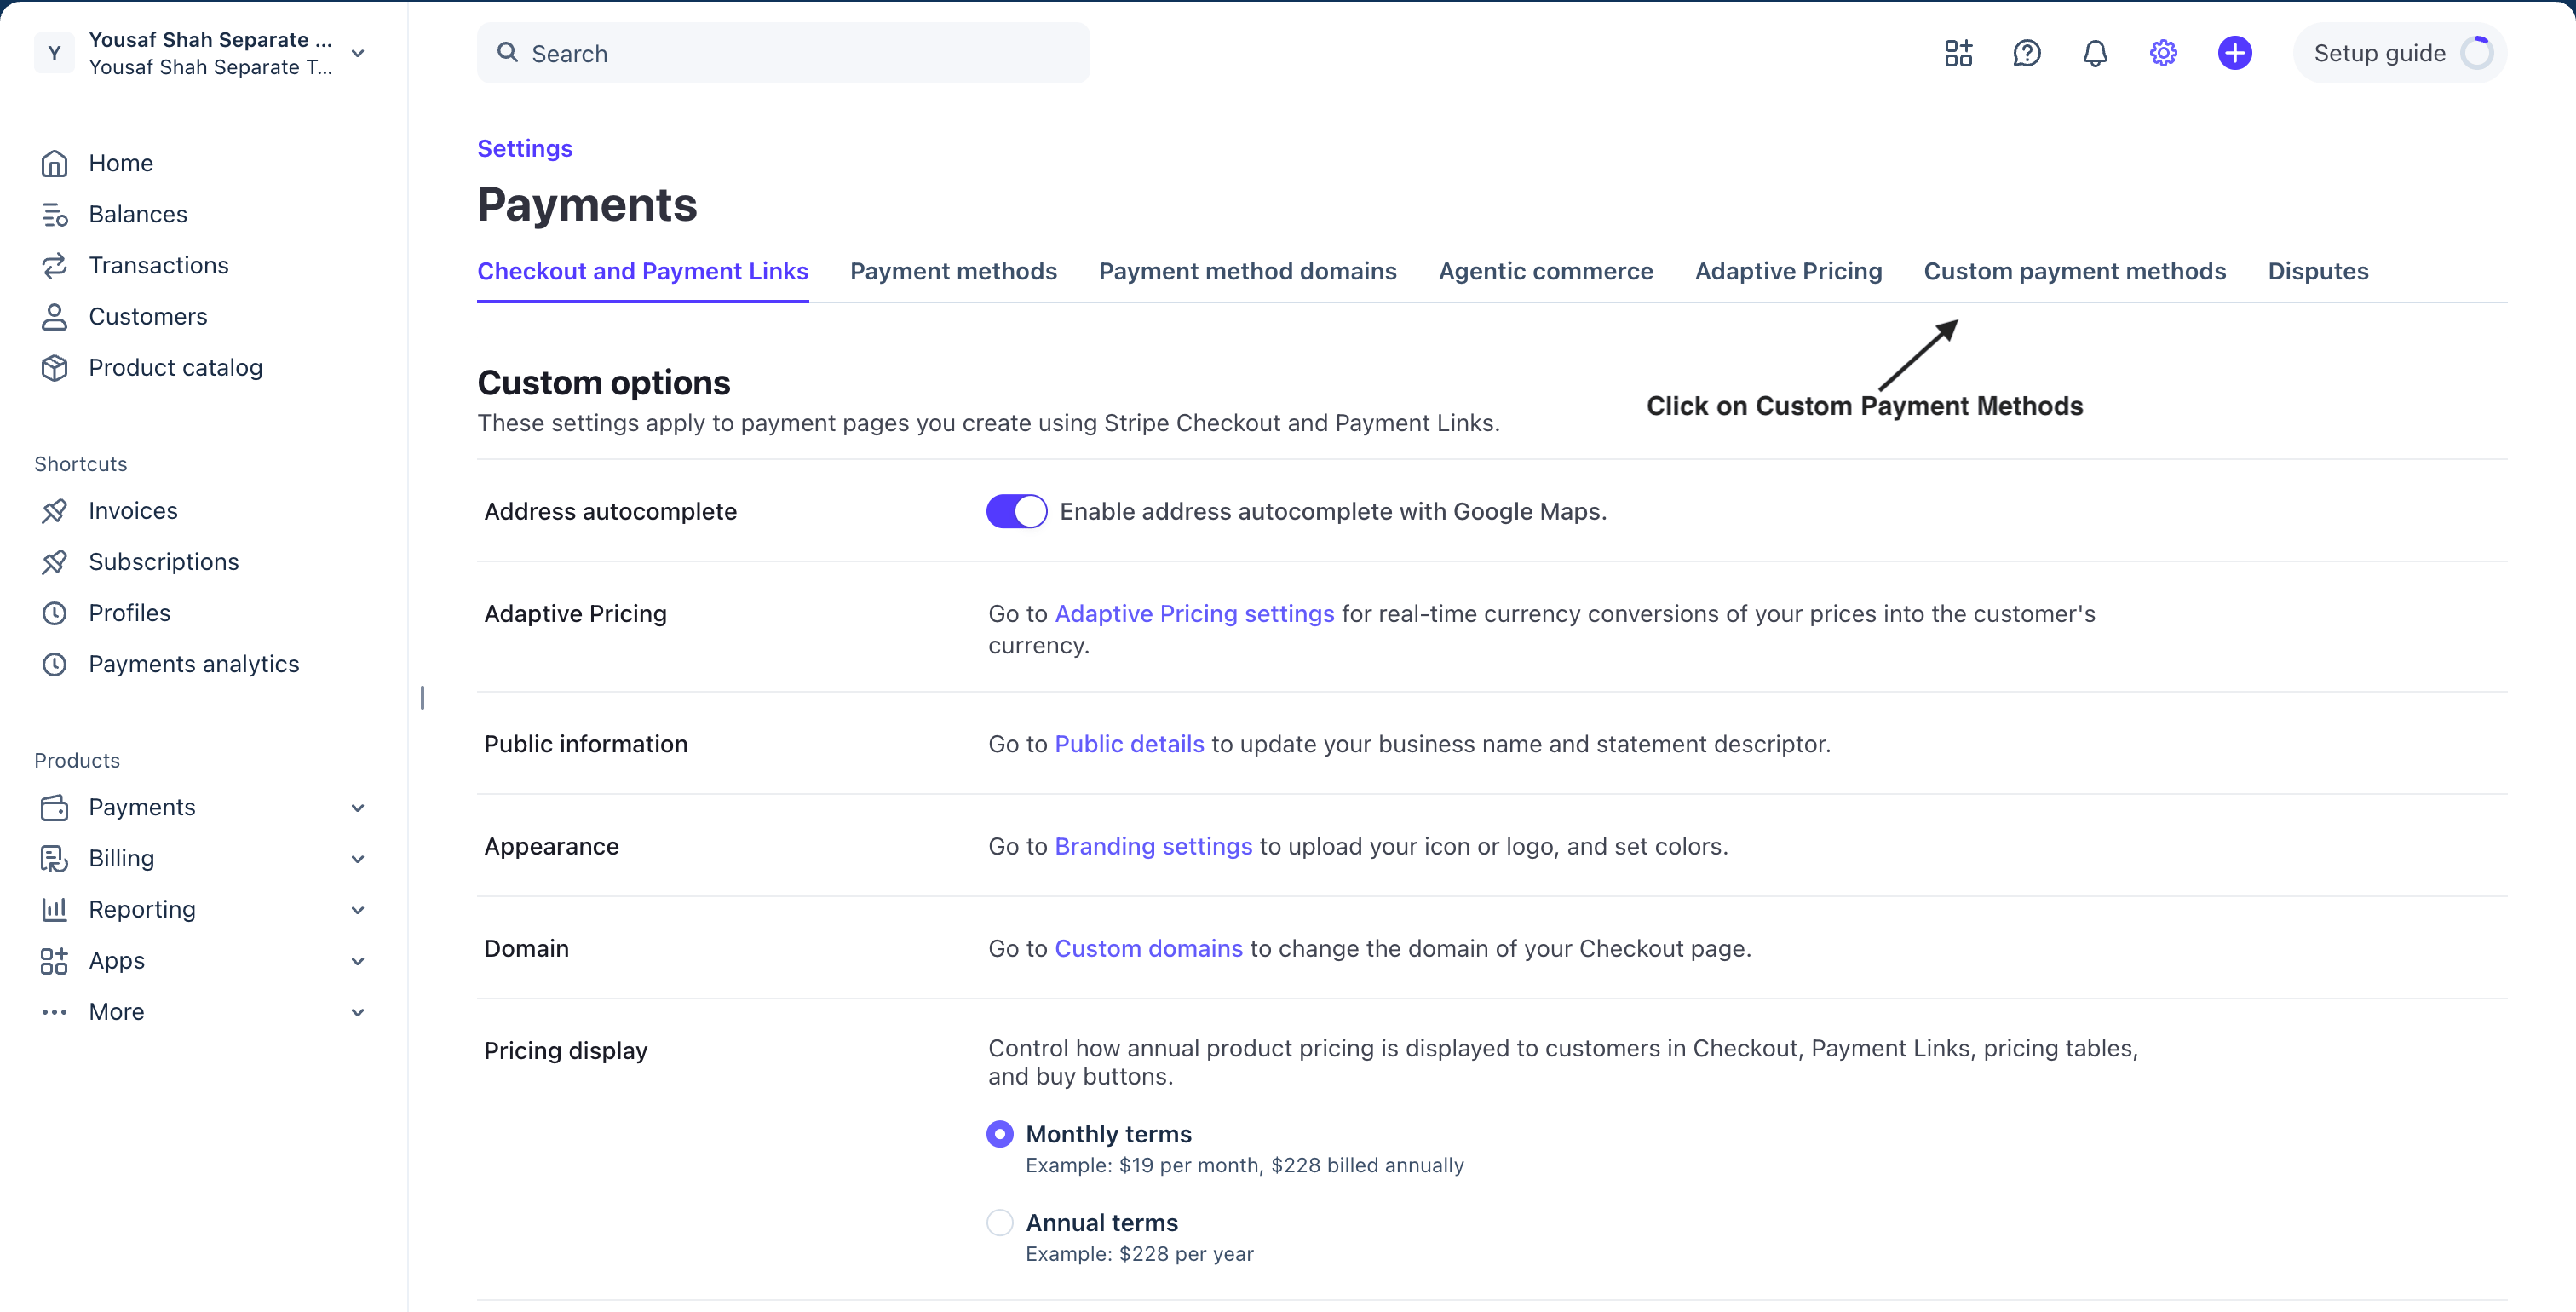
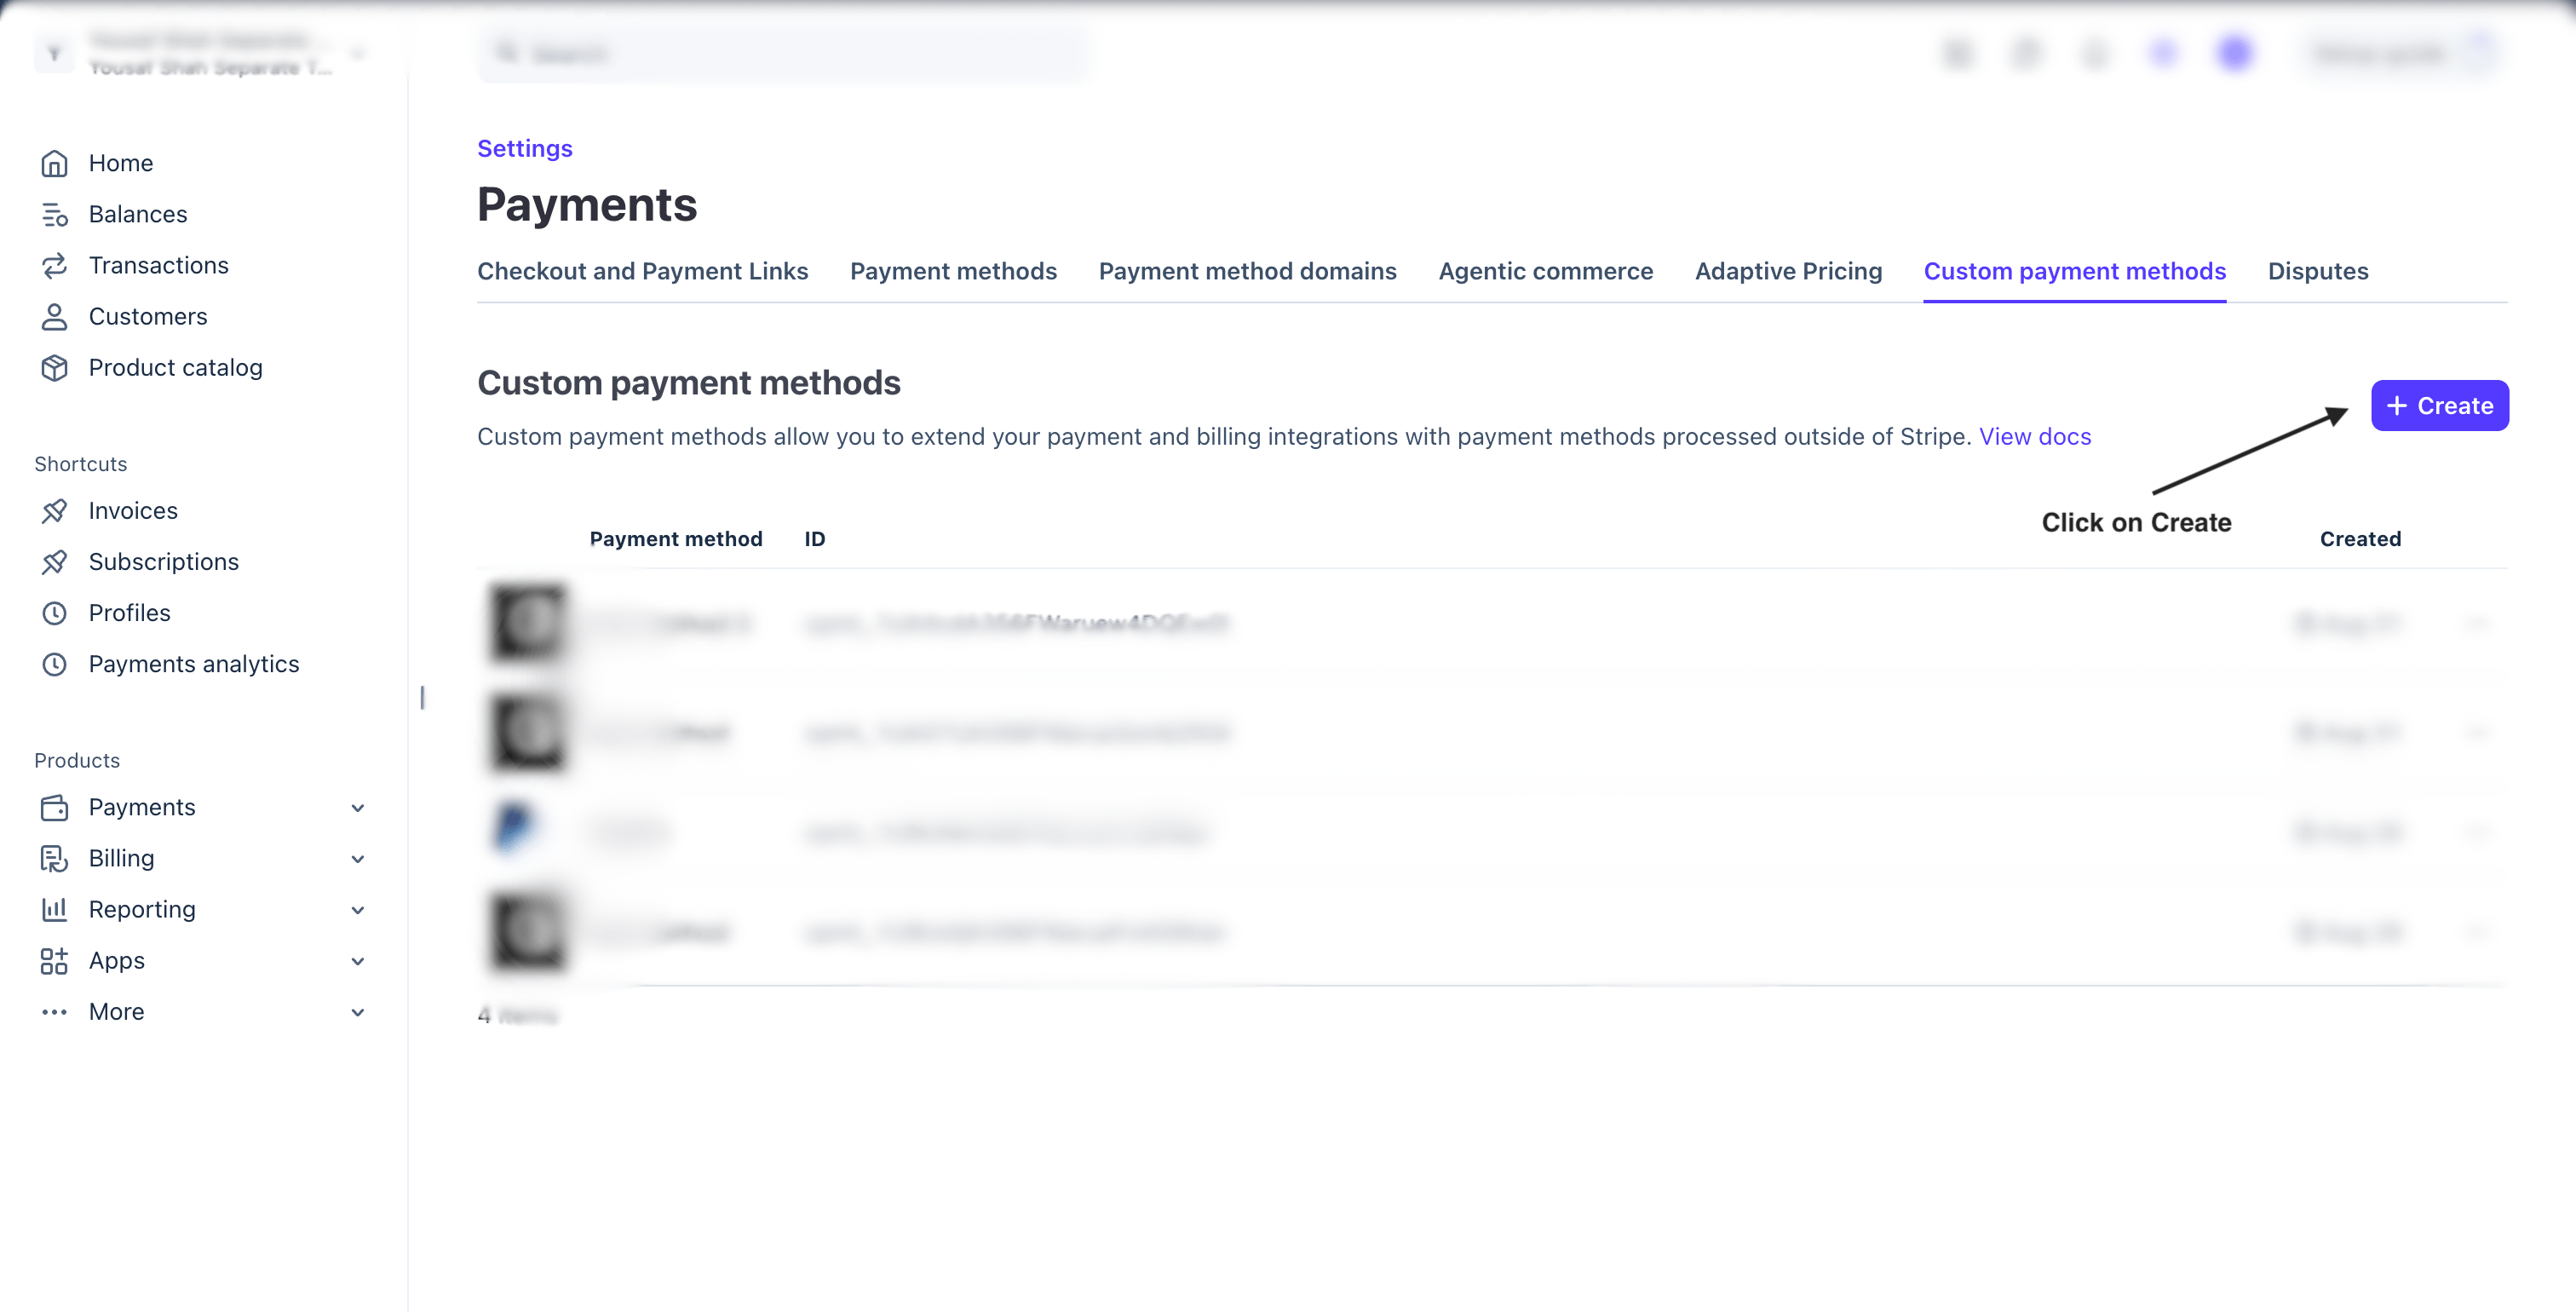
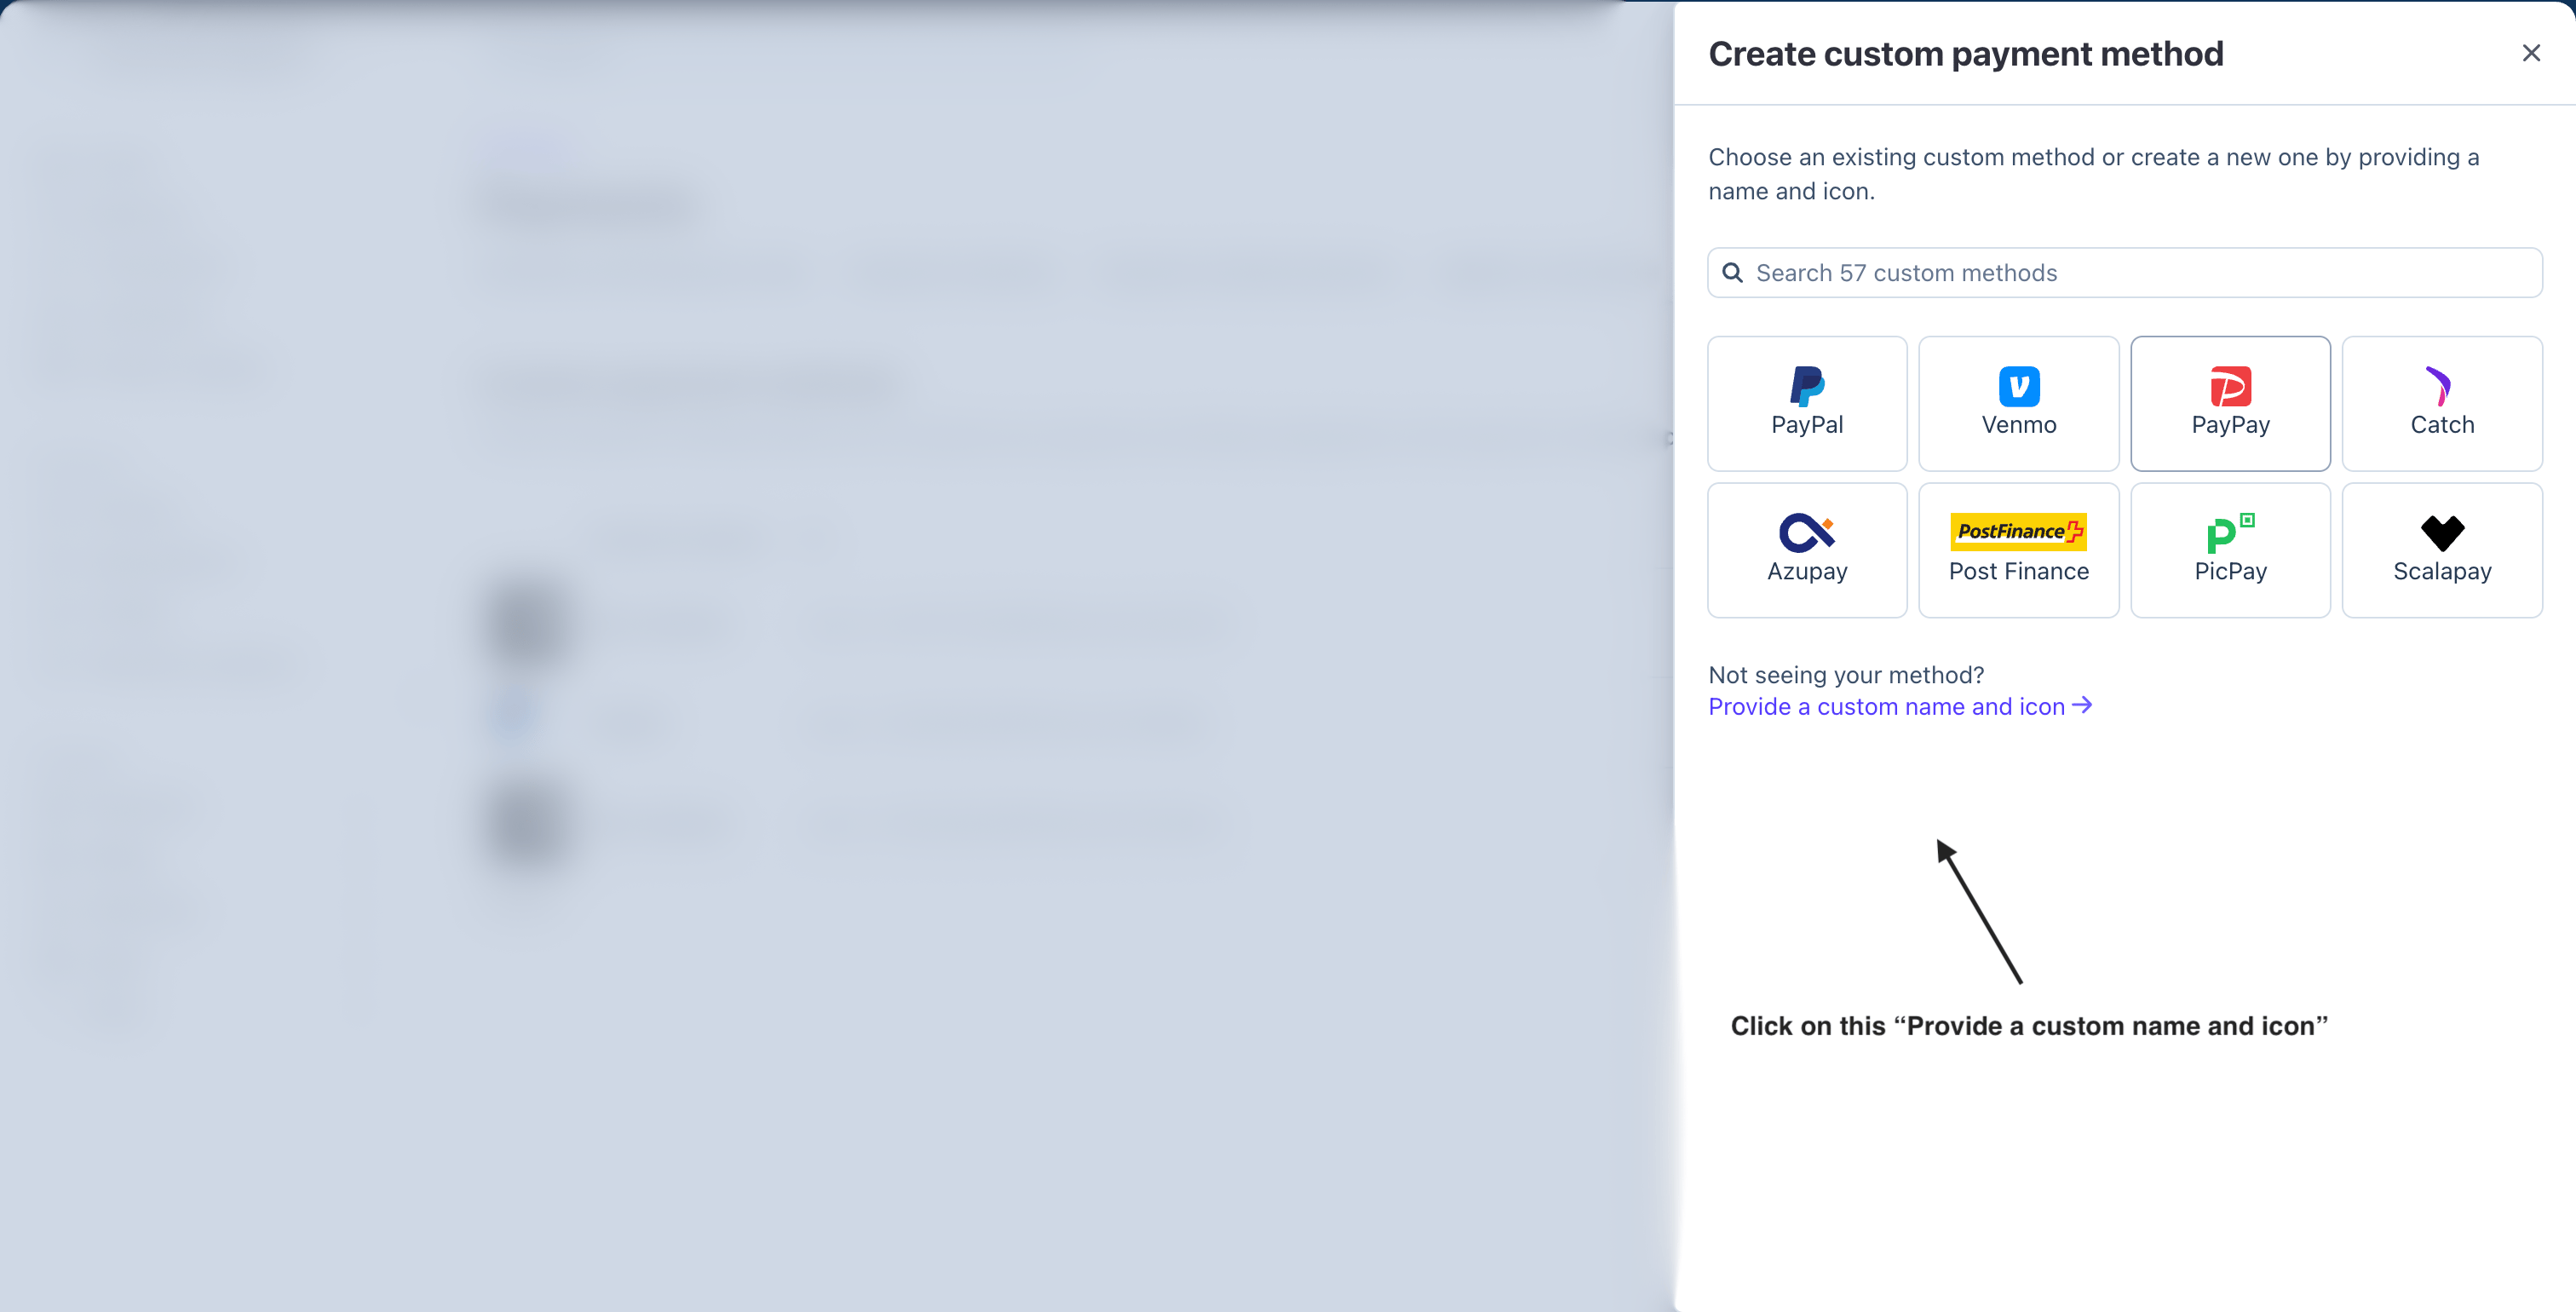
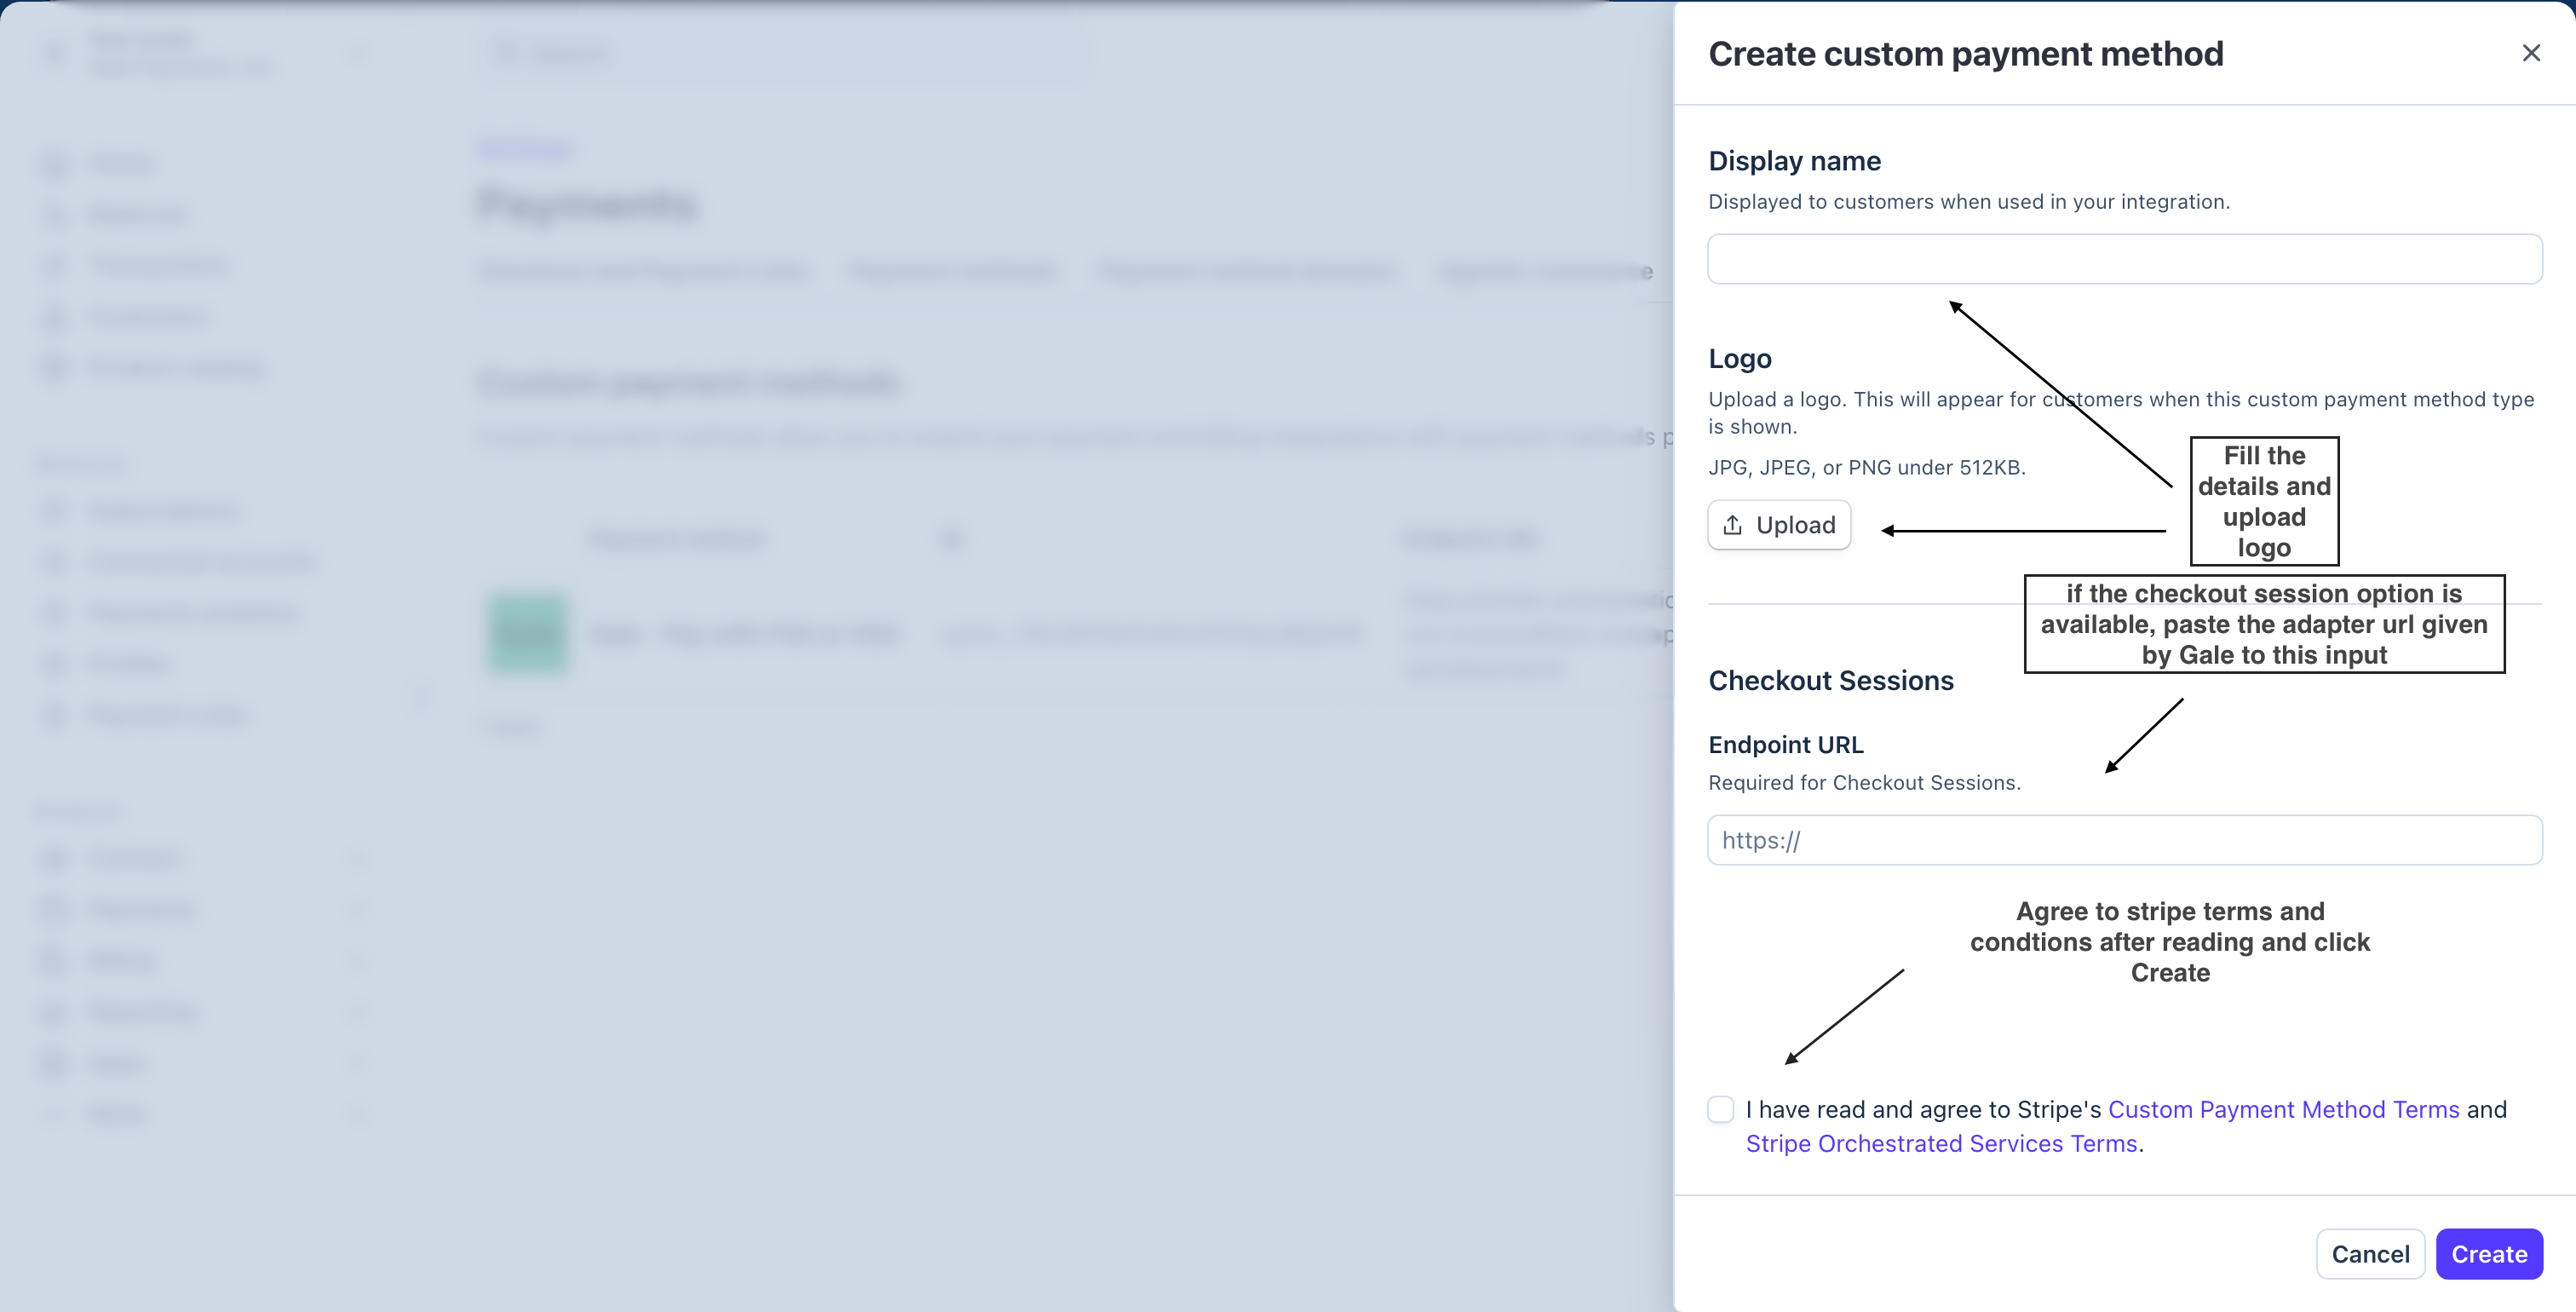
Create custom payment method → Provide a custom name and icon
Display name, logo, and the terms checkbox
3
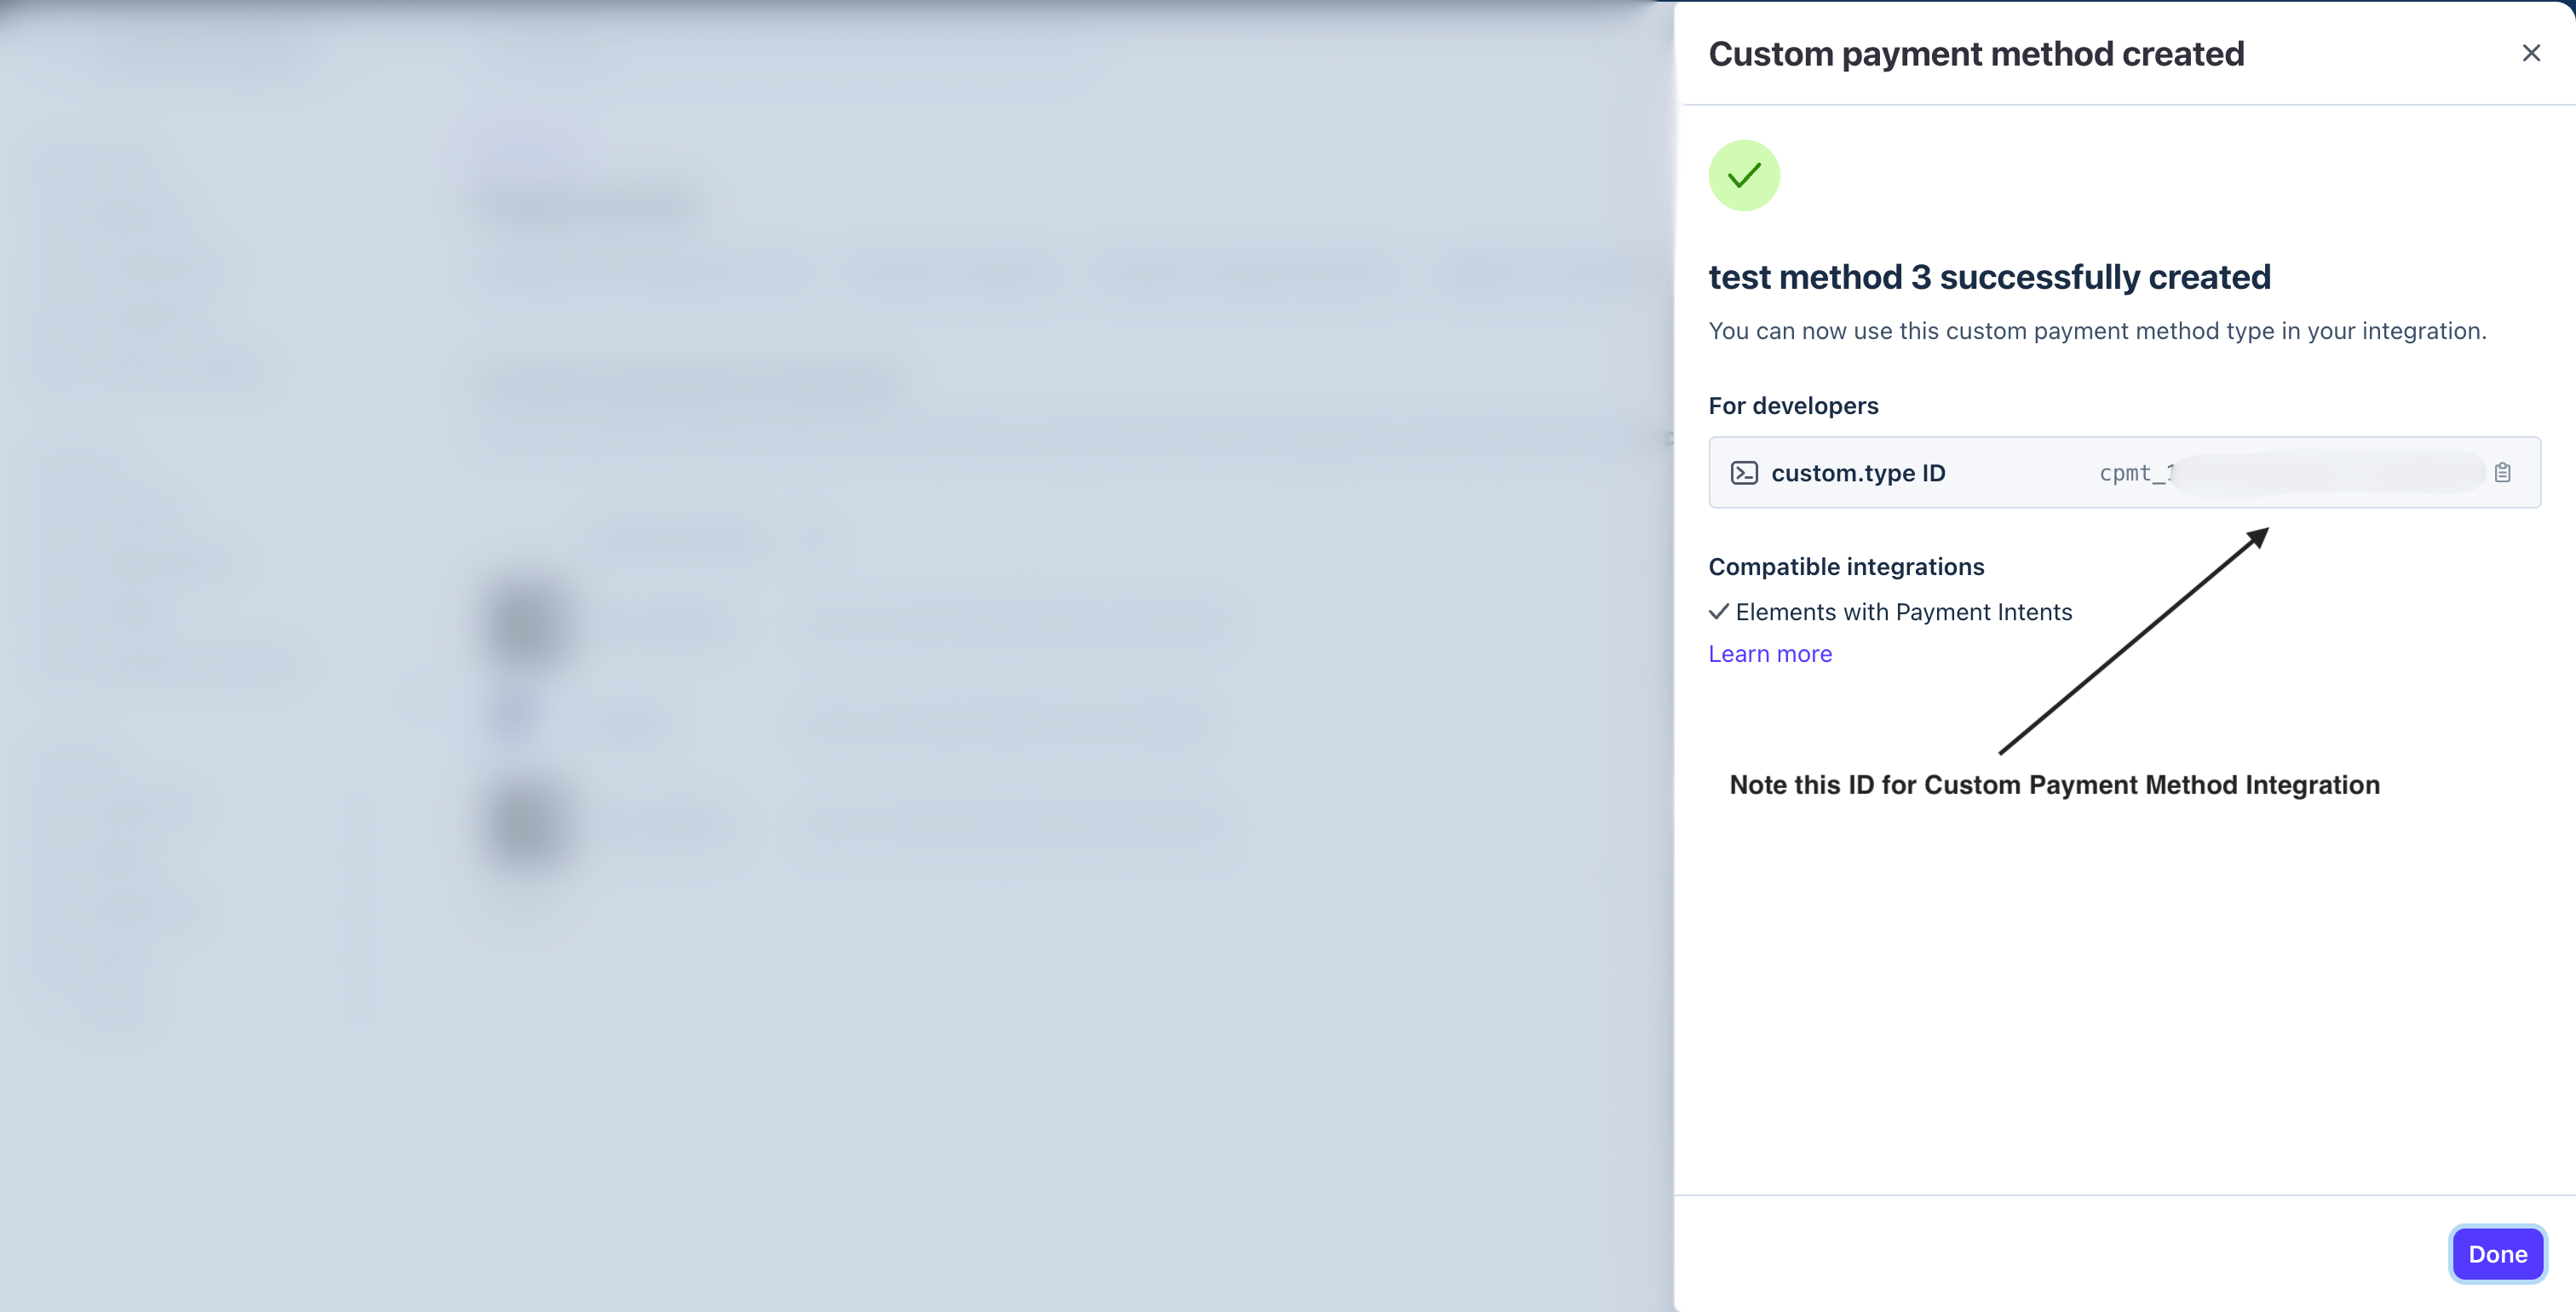
Copy the cpmt_ id
Stripe shows the custom.type ID, beginning cpmt_. Copy it and keep it
somewhere handy — you need it in the steps that follow, and Stripe displays
it only once.
Gale needs access to your Stripe account to import your catalogue and write
payment records back. Do this once per Stripe account, per mode, on the Gale
on Stripe page in your Gale Merchant Dashboard.
1
Create a restricted Stripe API key
In the Stripe Dashboard, open Developers → API keys and create a
restricted key — not your standard secret key, which can move money.Gale needs specific permissions, and Stripe will not let you edit them after
the key exists. See Create the restricted
key for
the full list and the walkthrough.
Stripe reveals a restricted key once. Copy it before you navigate away.
2
Paste your credentials into Gale
In your Gale Merchant Dashboard, open Integrations → Gale on Stripe and
fill in:
Gale checks the key against Stripe when you save, so a wrong key or a
missing permission shows up immediately rather than at a shopper’s first
payment.
3
Import your products
On the same page, run Preview to see what would change, then Import
to apply it. Gale matches every line item by product_id, so your catalogue
has to be here before a checkout can resolve eligibility.Turn on Keep products in sync and later edits in Stripe reach Gale on
their own. See Import
products.
4
Confirm the connection is good
The panel below the form should show your Stripe account ID and a tick
against every permission. A cross names the row to go and set in Stripe —
and because permissions cannot be added to an existing key, fixing one means
creating a new key.See Reading the connection
panel.
Two changes in your frontend, and one new endpoint on your backend.Your backend is what calls Gale, so it authenticates with your API key
(glm_test_… / glm_live_…). Generate one in the Gale Merchant Dashboard under
Developer Tools → API Keys — see Getting your API
key. Keep it server-side;
it must never reach the browser.
1
Frontend — register the CPM
Stripe’s deferred Elements setup — Collect payment details before creating an
Intent, Collect payment details —
gains one option: customPaymentMethods,
documented for the Payment Element
here.
Custom payment methods render last in the Element by default. To put Gale
above the card options, pass paymentMethodOrder: ['cpmt_...', 'card'] when
you create the Payment Element.
2
Frontend — branch on submit
Stripe’s handler — Submit the payment to Stripe on the same
deferred-Elements page —
validates, mints the PaymentIntent, then confirms with
stripe.confirmPayment.
Gale adds a branch before the intent is created, and leaves the card path
untouched.
Gale reports payment outcomes to your application over webhooks. Set your
endpoint under Developer Tools → Webhooks in your Gale dashboard, then
subscribe to the events you need:
Event
Fires when
order.completed
Every payment leg captured — this is settlement, not the redirect
order.failed
The charge did not complete
refund.succeeded
A refund cleared
dispute.created / dispute.closed
A chargeback opened or resolved — Gale is the only source, Stripe has no charge.* events for a Gale charge
Everything on the Stripe side is mode-dependent — sandbox and live each need
their own cpmt_ id. Your Gale key carries its environment in the prefix:
glm_test_… or glm_live_….
There are two mode settings and they’re separate: the one in your <Elements> options is Stripe’s deferred-mode setting, and the one in the cart metadata is what Gale reads. Keep them consistent.
One-time — omit mode in the cart metadata, or send mode: 'payment'. A single charge. Stripe receives the payment record once the charge has settled, not at the moment of authorisation, so the record reflects money that actually moved.
Subscription — send mode: 'subscription'. See below.
Gale owns the subscription and initiates every renewal. There is no Stripe
subscription and no Stripe invoice — Stripe receives a payment record per cycle,
for reporting only.
plan_id is required on every subscription line item — there is no
fallback to “the product’s only plan”. A plan that is unknown, archived, or
not attached to that product returns 422 PLAN_NOT_FOUND.
interval and interval_count are rejected in cart metadata. Cadence
belongs to the plan.
price is optional, but if you send it, it must equal amount × quantity
from the plan.
Your plans come from your Stripe recurring prices — each one becomes a Gale
plan when you import or sync. Stripe stays the source of truth, so change the
price in Stripe rather than the plan in Gale. Look up ids through the plans
API.
A 422 PLAN_NOT_FOUND on a product you believe is set up is usually
Stripe-side: the price is one-time rather than recurring, the price is
inactive, or the product has not synced since you added it.
Gale schedules and charges every renewal, so Gale’s webhooks are the only
place a renewal is announced. Your existing Stripe Billing handlers will never
see one — there is no Stripe subscription and no invoice.paid.
Event
Fires when
subscription.created
The first cycle is paid and the subscription starts
subscription.renewed
A renewal cycle charged successfully — this is your renewal signal
subscription.payment_failed
A cycle failed; retries may still follow
subscription.canceled
Billing has actually ended, not when a period-end cancellation is scheduled
subscription.resumed
A scheduled cancellation was called off
subscription.disputed
A cycle was charged back
Without a subscription.renewed handler, a subscription bills correctly for
months and your system never hears about a single cycle — nothing errors,
entitlement just silently stops extending.
Refund the order the cycle produced, with POST /v2/refunds and your API
key — there is no per-cycle refund call. Each cycle in
GET /v2/subscriptions/{id} carries the order_id it produced. Gale reports
the refund to Stripe against the payment record.
Subscriptions
How billing, retries, statuses, cancellation and the /v2/subscriptions API
work — the same on every Gale integration.
Wrong or missing API key, or a key from the other environment → 401/422 from /api/v2/checkout.
Line item missing product_id → 422. It’s required on every line item. A product_id that Gale doesn’t recognise as HSA/FSA-eligible is accepted — that item just charges on the non-eligible leg.
success_url / failure_url not HTTPS → checkout creation is rejected. Use a tunnel or a local certificate in development.
Payment Records not enabled on your Stripe account → the charge still completes normally; the record just won’t appear in Stripe.
Do not report a Gale charge to Stripe yourself. Gale writes the payment
record server-side — calling a Stripe reporting endpoint for the same charge
will double it.
Use your glm_test_… Gale key and your test-mode cpmt_… id. Environment
is encoded in the key prefix — nothing else about the request changes.
2
Confirm the option renders
Load your checkout: Pay with FSA/HSA appears after your native methods,
with the name and logo you gave the type in Stripe.If it does not, the problem is Stripe-side — wrong mode, wrong account, or a
cpmt_ id that does not belong to the publishable key mounting the Element.
Also check that Adaptive Pricing is not active. No Gale setting changes this.
3
Confirm the branch skips stripe.confirmPayment
Select Gale and submit. Your handler should branch before Stripe’s confirm
call, so no PaymentIntent is created or confirmed — if one appears in your
Stripe logs, the branch is not firing.
4
Create a checkout
Your backend endpoint calls POST /api/v2/checkout and answers
{ data: { checkout_url, checkout_id } }, and the shopper lands on the
Gale-hosted card page.
5
Run a mixed cart
Include an item whose product_id Gale does not recognise as eligible. It
should still charge, on the non-eligible leg, rather than being rejected.
6
Confirm the outcome server-side
Verify the result on your own backend before fulfilling. Then check the
order appears in your Gale dashboard under Orders with the
reference_id you sent — this is the authoritative record — and that a
payment record appears in Stripe against your custom payment method,
shortly after the charge settles rather than at authorisation.
7
Test cancel and decline
Abandon the Gale page and confirm the shopper returns to your failure_url
and can pay another way, with the order left unfulfilled.
There is no PaymentIntent and no Charge for a Gale payment. So a
payment_intent.succeeded or charge.succeeded handler will never fire for
one, and it will not fire quietly — no error, no failed delivery, just
silence. If your fulfilment hangs off those events today, it will not fulfil
Gale orders. Confirm the outcome server-side on your own backend instead: the
shopper returns from a page Gale controls, so the browser redirect is not
something your server can verify.