

Prerequisites
- An existing checkout built with Stripe Checkout Sessions.
- Access to Stripe’s merchant-instructed orchestration preview, which Stripe grants per account. Ask Stripe if you do not have it.
- Stripe Dashboard access, with permission to create API keys.
- Gale Merchant Dashboard access.
- Your adapter URL from Gale. You paste it into Stripe while creating the payment method, so get it before you start.
Step 1: Create your custom payment method
A custom payment method type is what makes Gale appear in your Payment Element. Create one per Stripe account, in each mode.Open Custom payment methods
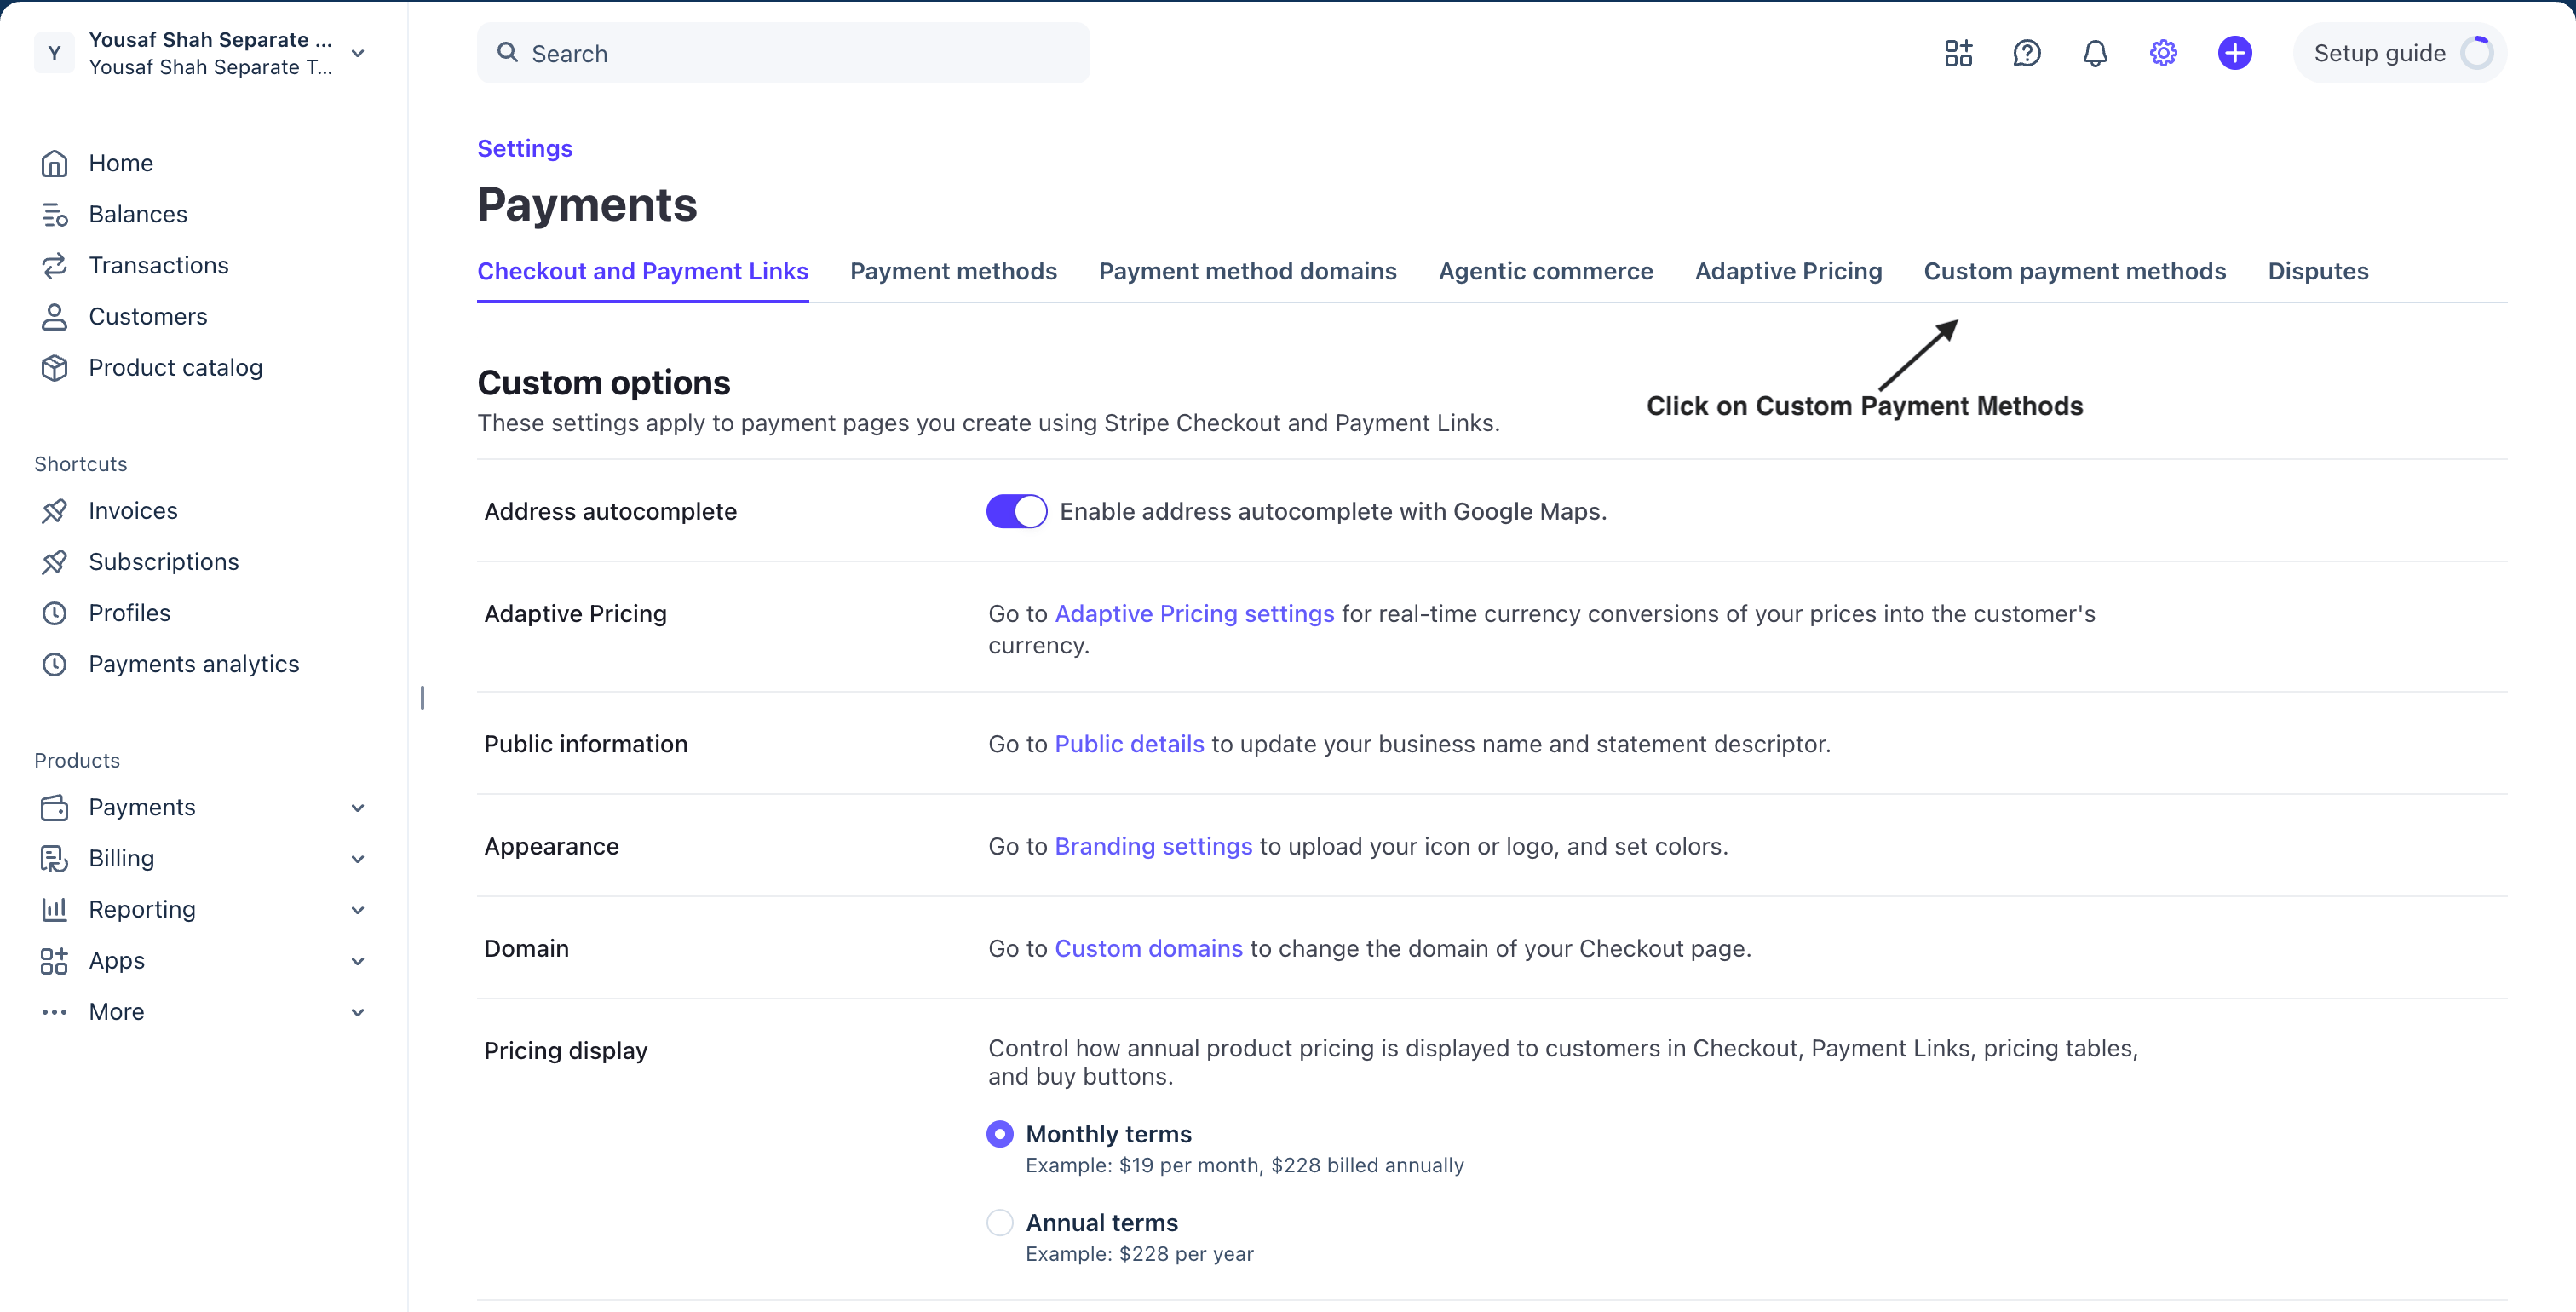
Settings → Payments → Custom payment methods
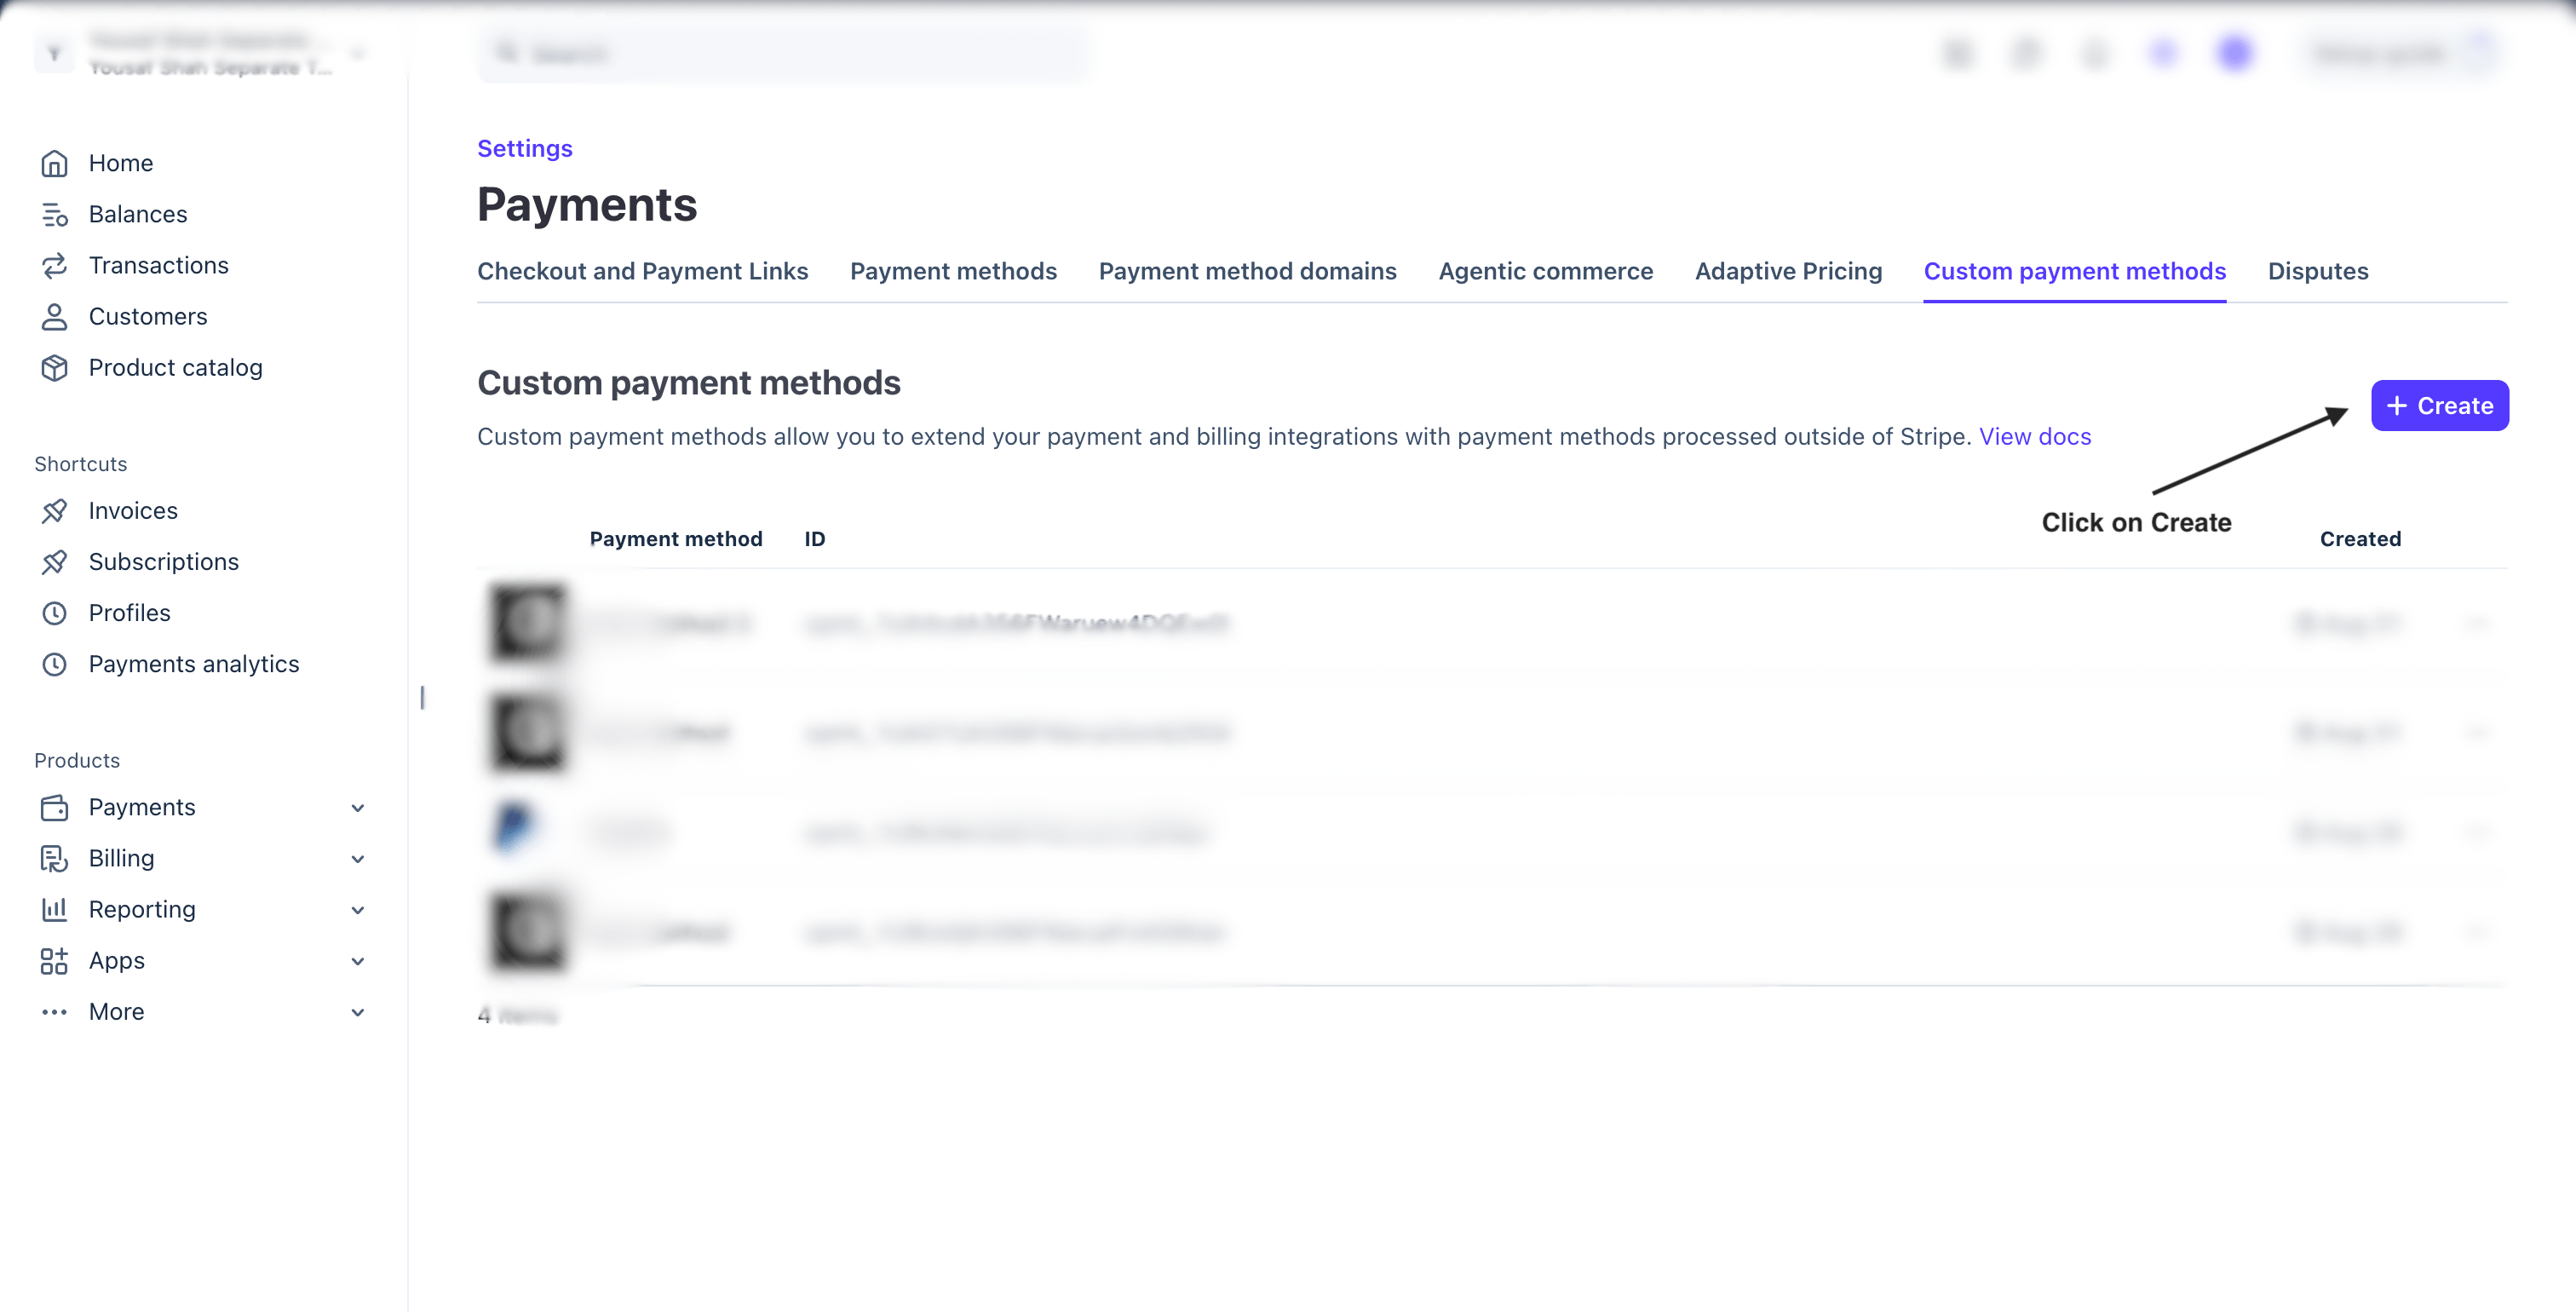
Custom payment methods → Create
Choose a custom name and icon
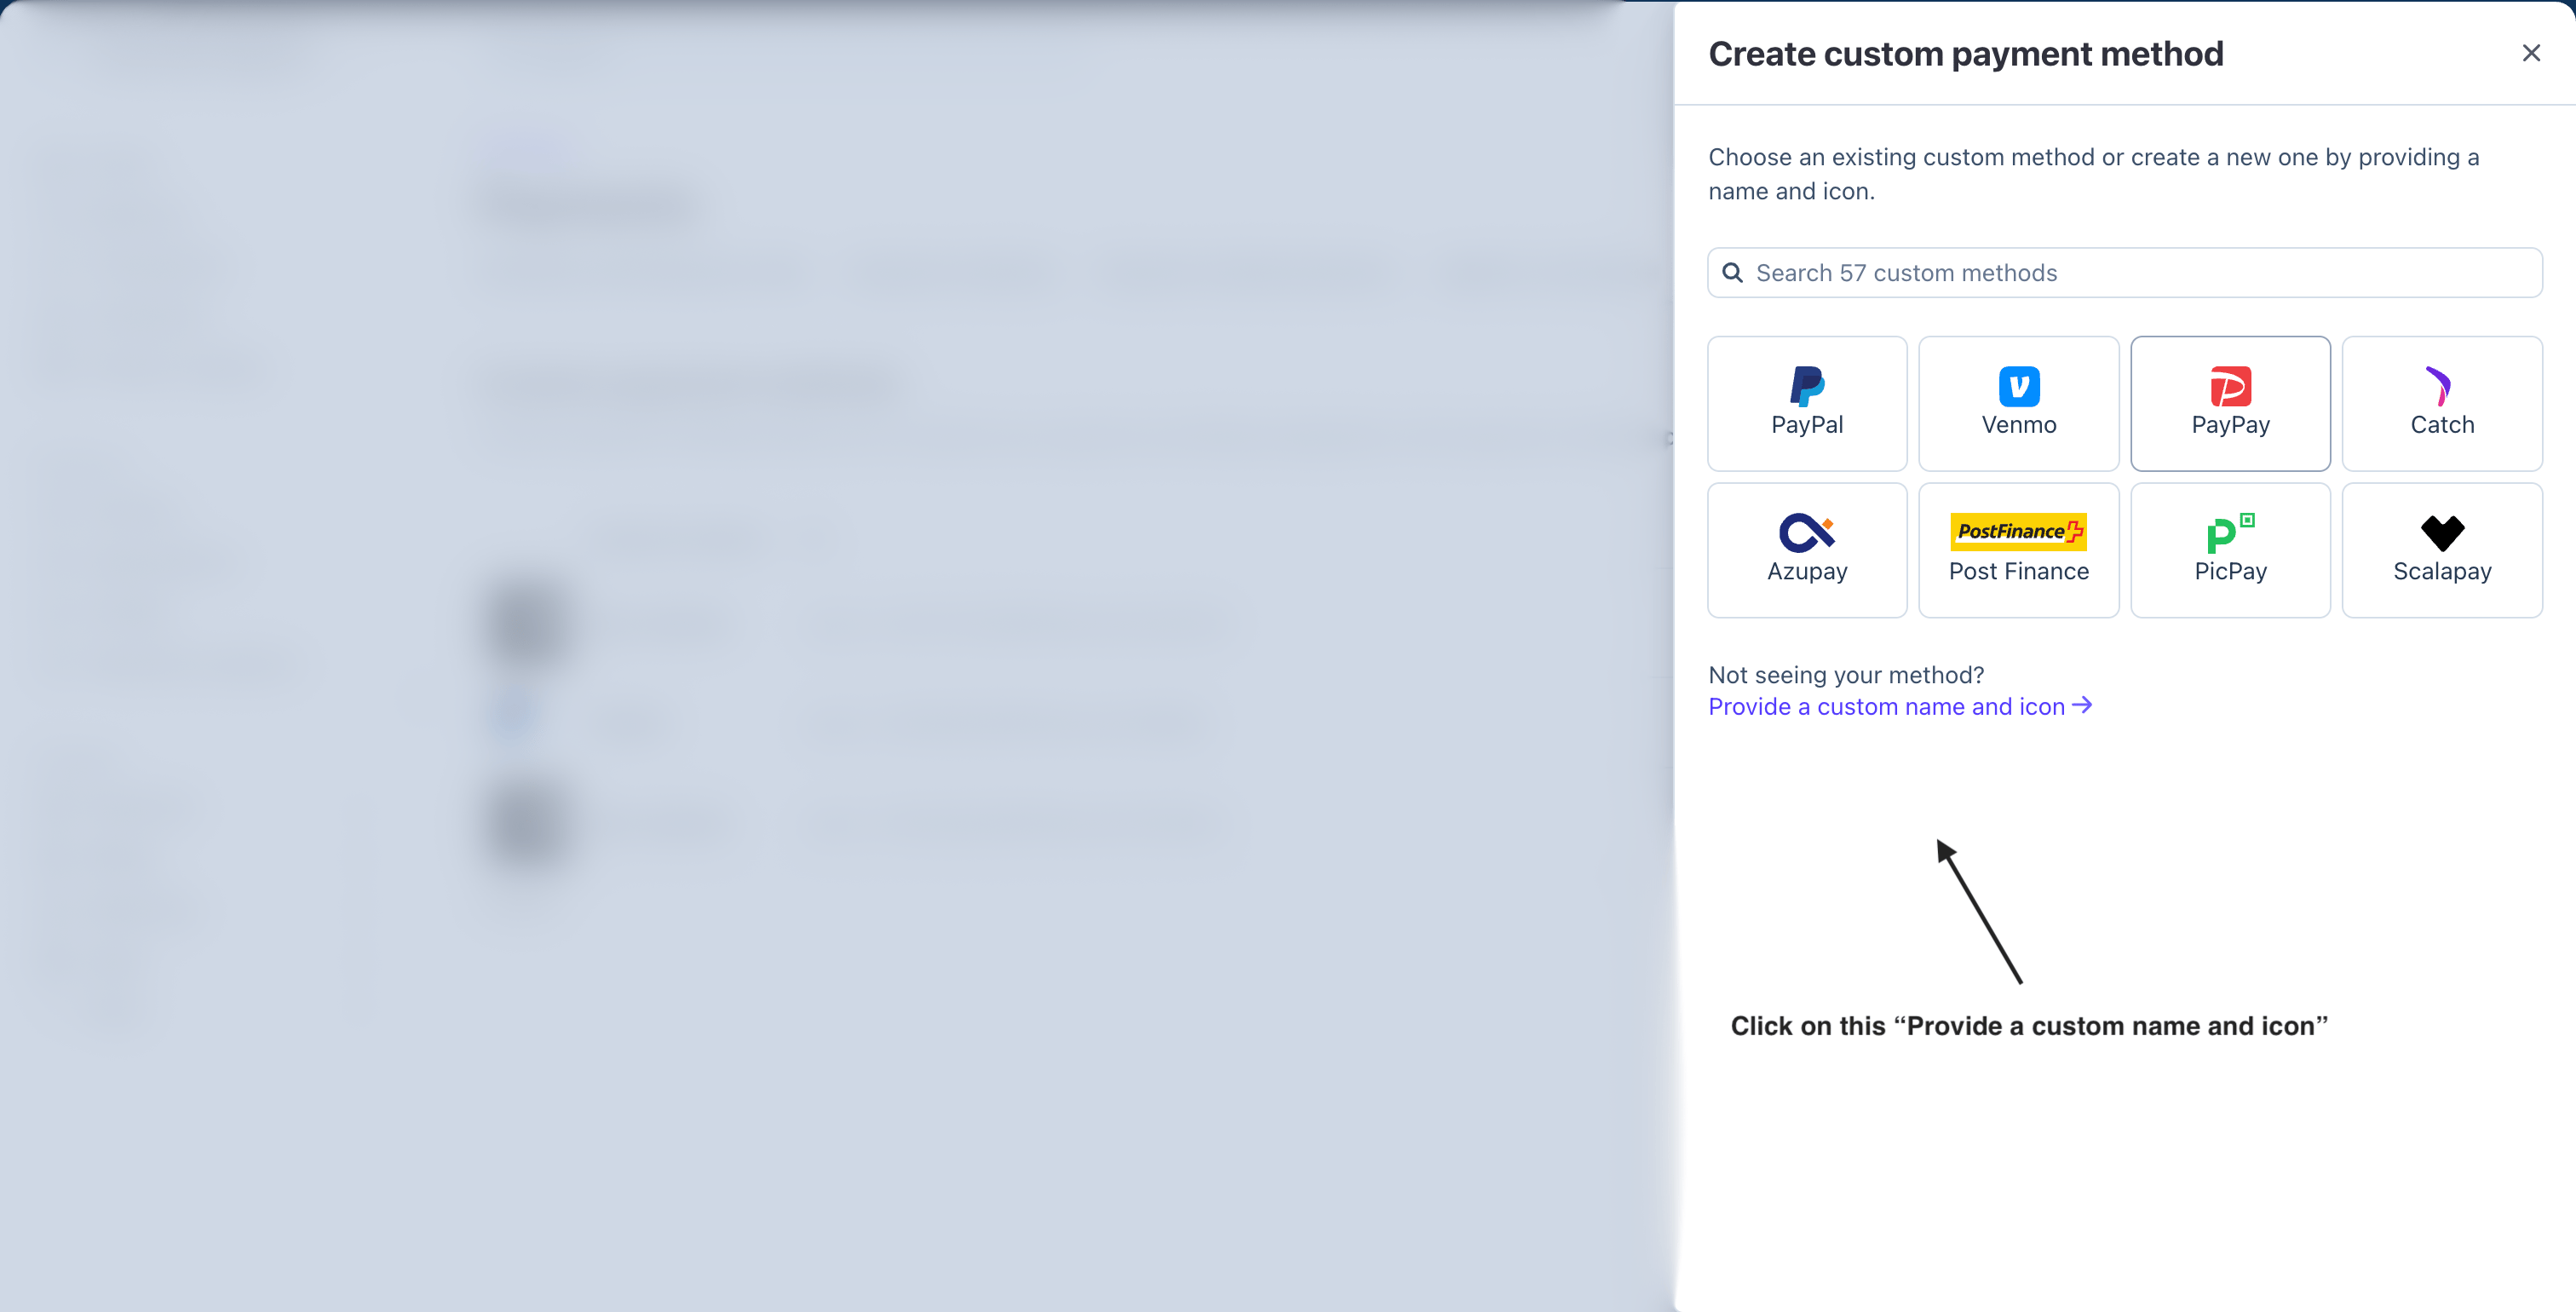
Create custom payment method → Provide a custom name and icon
Set the name, logo and adapter URL
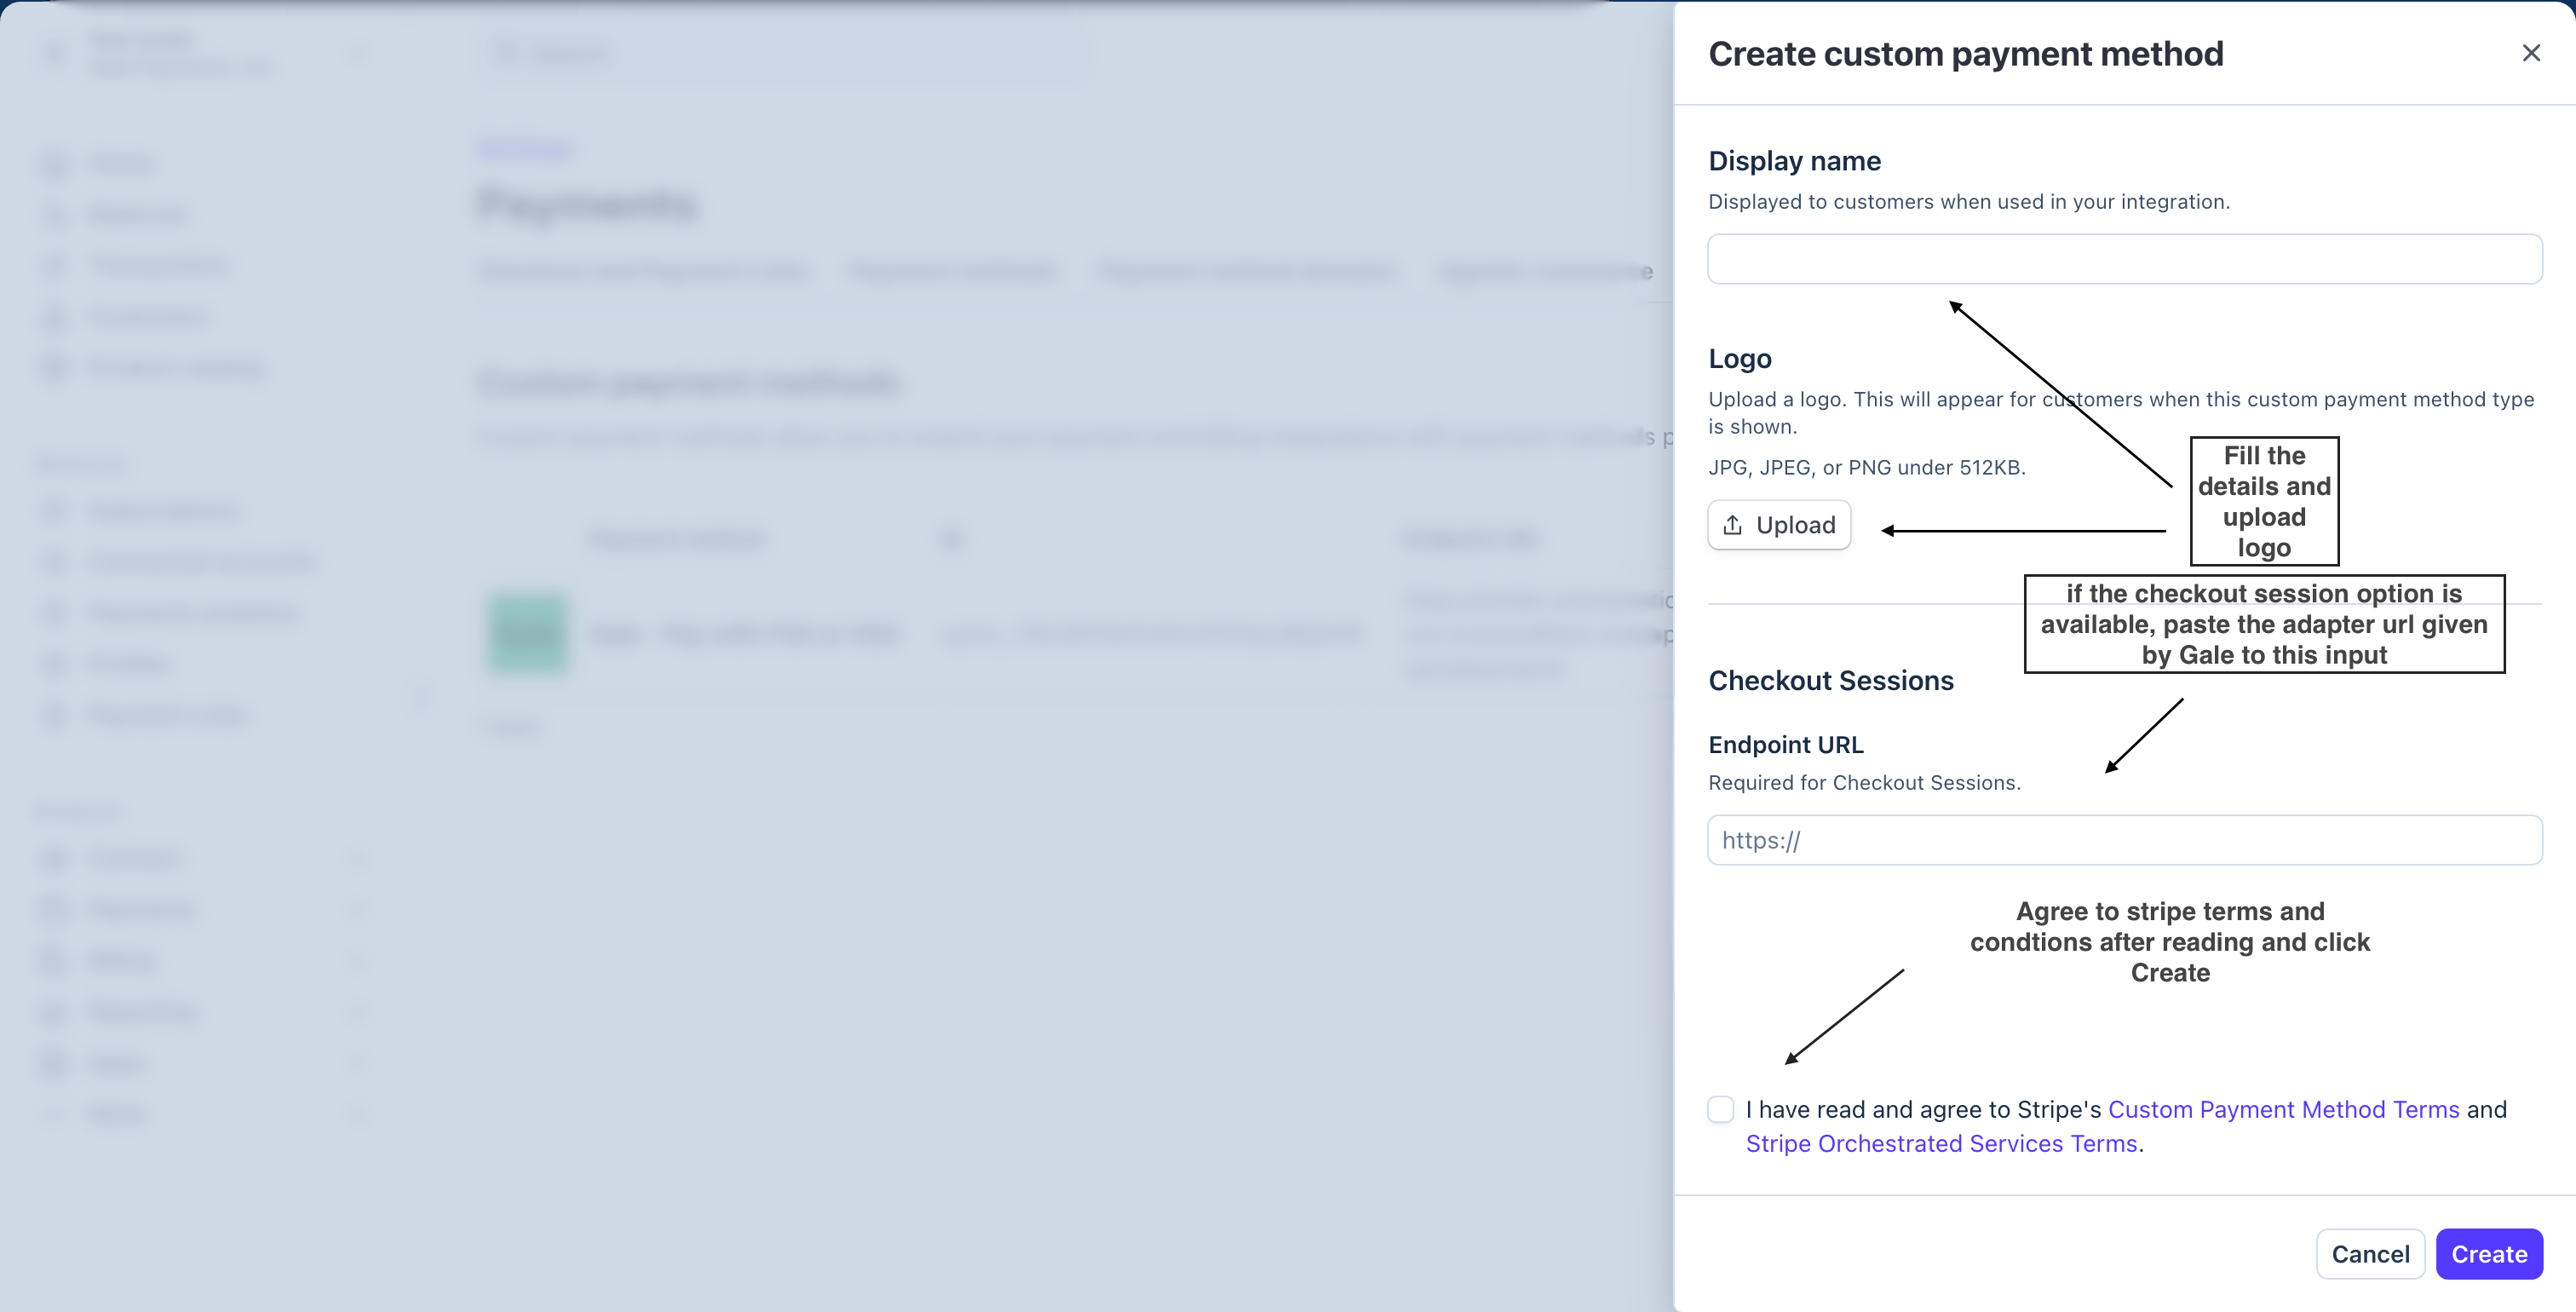
Display name, logo, and the Checkout Sessions endpoint URL
Copy the cpmt_ id
cpmt_. Copy it and keep it
somewhere handy — you need it in the steps that follow, and Stripe displays
it only once.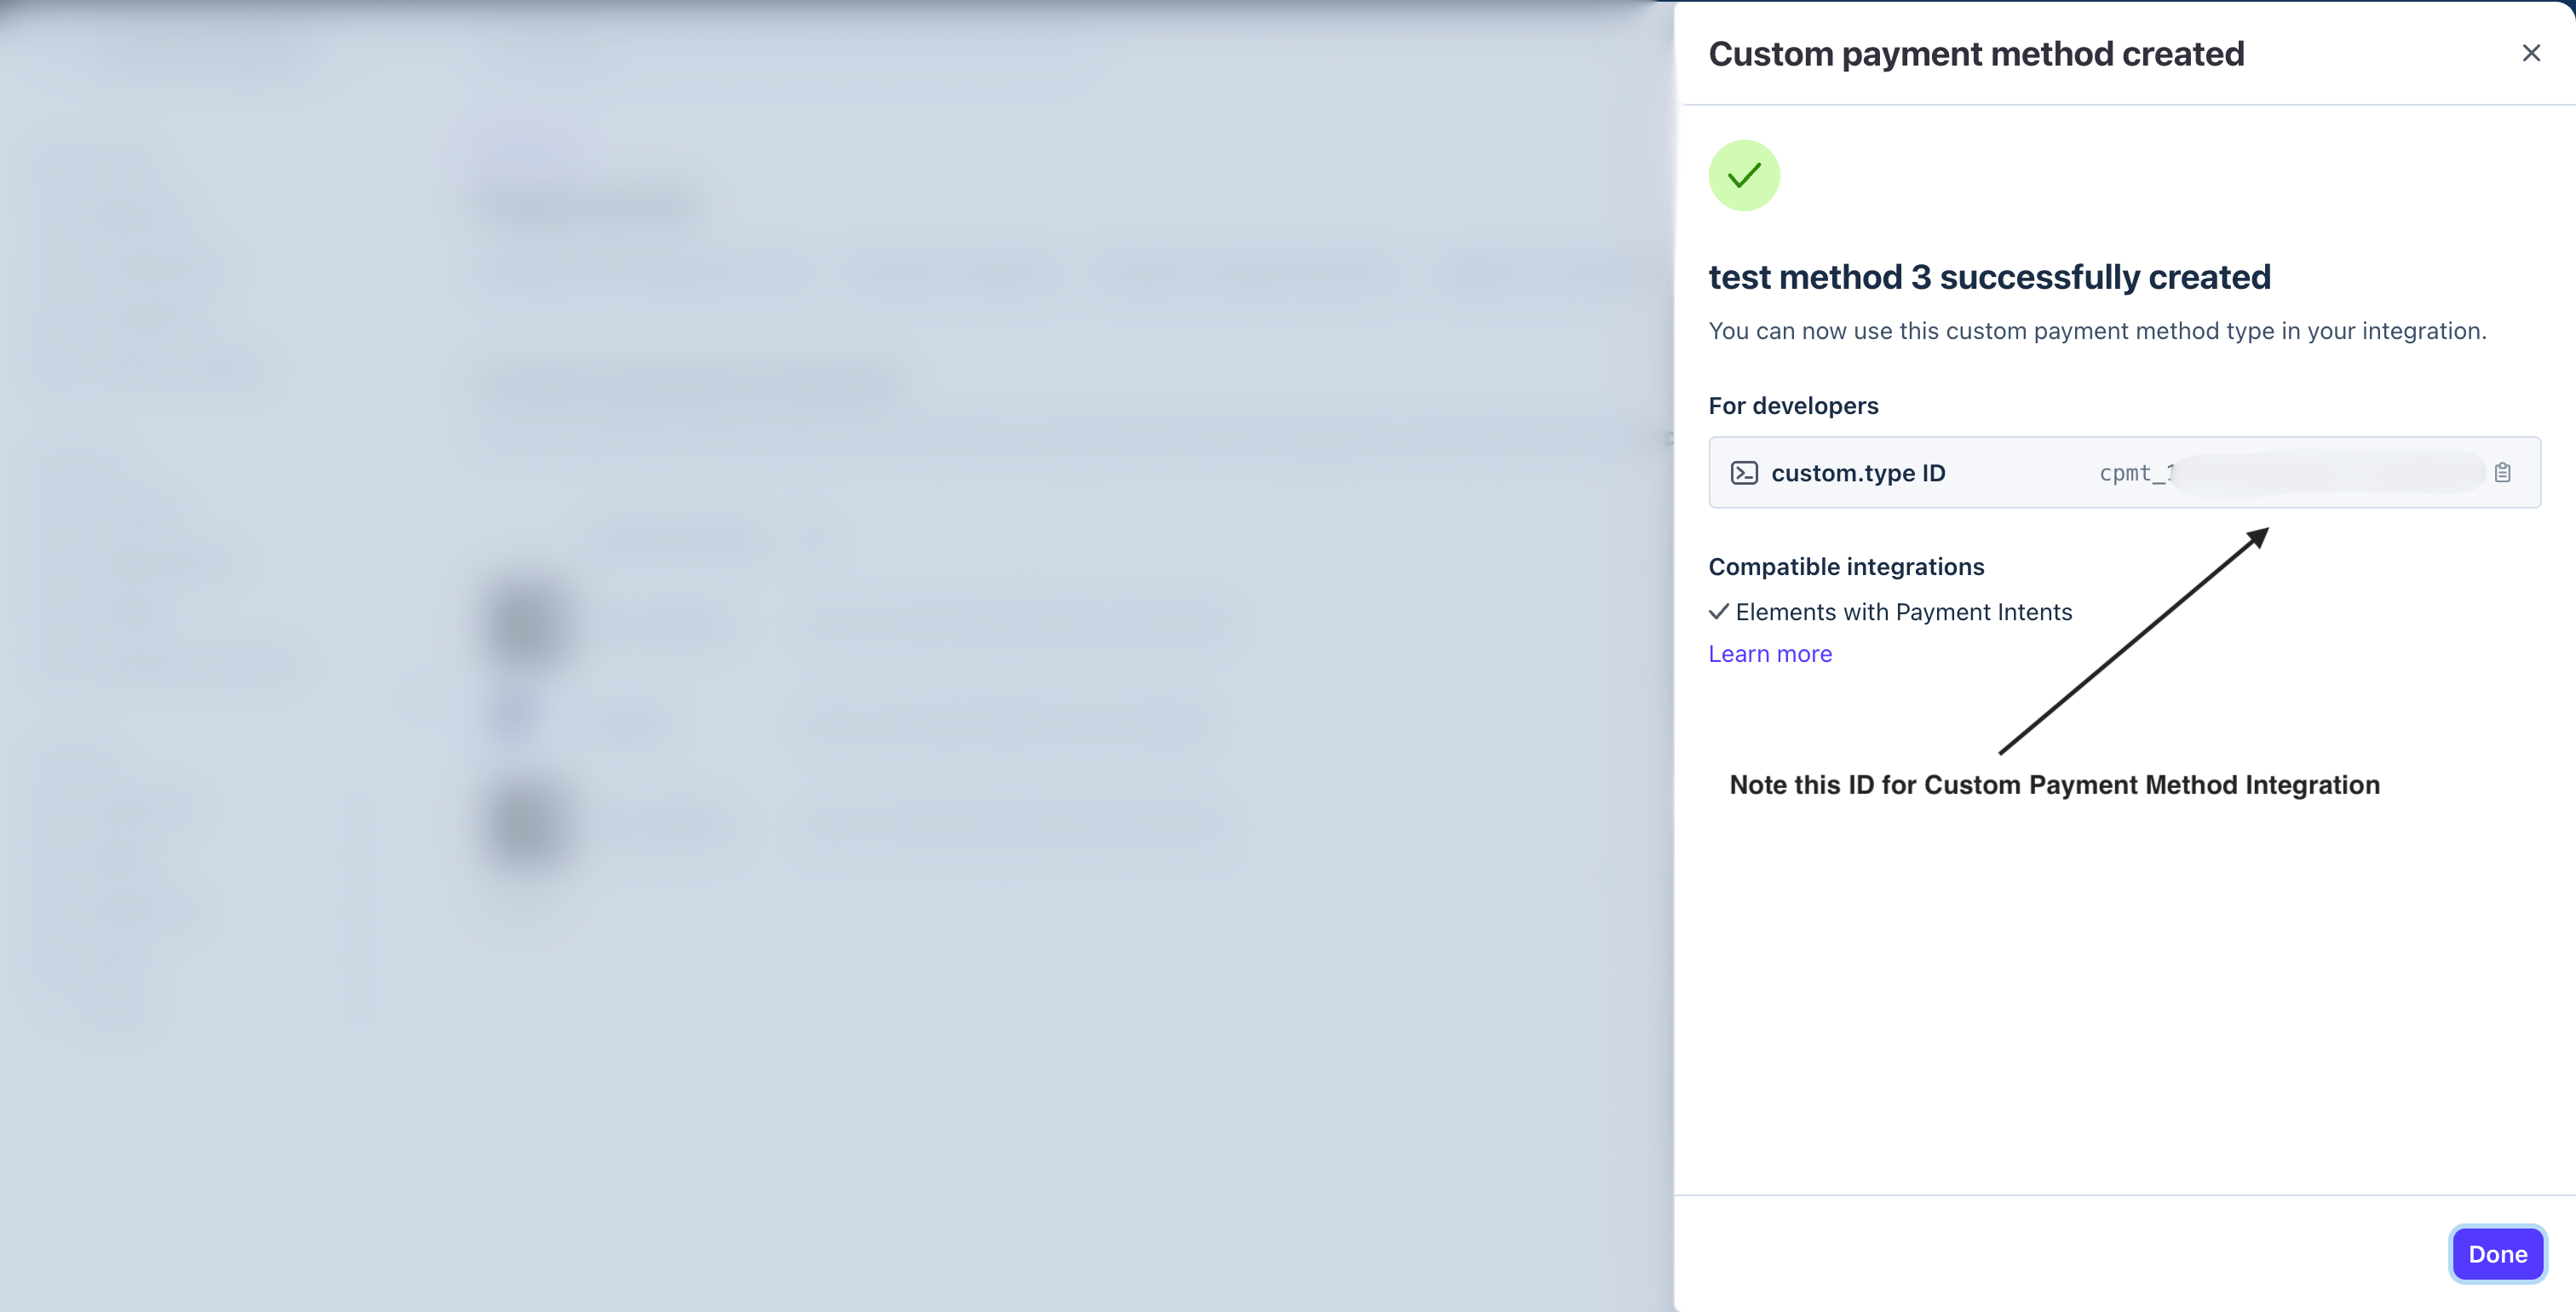
Custom payment method created — note the cpmt_ id
Copy your signing secret
Stripe signs every call it makes to Gale’s adapter URL. The signing secret is how Gale checks a call genuinely came from Stripe — without it, Gale cannot tell a real payment from a forged one, so it turns every call away.Open Webhooks
Find the destination Stripe created for you
cpmt_ id
you just copied. That name is the reliable way to spot it: on an account with
several destinations, matching by name beats reading URLs.Reveal the secret
whsec_.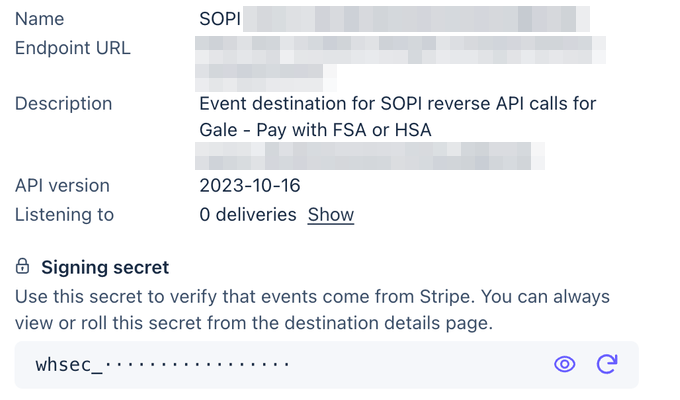
Destination details — the signing secret, with reveal and roll
cpmt_ id and
the signing secret all get pasted into the Gale on Stripe page in your Gale
dashboard. See Gale on
Stripe.Step 2: Connect Stripe to Gale
Gale needs access to your Stripe account to import your catalogue and report payment outcomes back. Do this once per Stripe account, per mode, on the Gale on Stripe page in your Gale Merchant Dashboard.Create a restricted Stripe API key
Paste your credentials into Gale
Import your products
Confirm the connection is good
set. A cross names the row to
go and set in Stripe — and because permissions cannot be added to an
existing key, fixing one means creating a new key.See Reading the connection
panel.Step 3: Add Gale to your checkout
Four changes to the Checkout Session your backend creates, and one beta flag on the client. Your card path is untouched.Server-side — create the Checkout Session
POST /v1/checkout/sessions),
with four changes.shipping_address_collection is not optional here the way it is in Stripe’s
quickstart. Gale requires a shipping address on the cart and can only use
what the session exposes — collect it here, with a ShippingAddressElement,
or by passing shippingAddress to confirm(). Without one, checkout
creation fails and the payment is declined with no shopper-visible reason.Client-side — Elements with Checkout Sessions
loadStripe. Nothing else is
Gale-specific — the CPM renders in the Payment Element because the session
lists it, and confirm() is the same call a card payment makes.ui_mode also supports embedded (Stripe’s embedded component) and hosted (redirect to a Stripe-hosted page, with no Elements code at all). The Gale CPM appears in all three — Stripe lists Checkout as supported for custom payment methods, with one exception: it does not work when approval_method is manual.Step 4: Set your Gale webhook URL
Stripe reports the session and the renewals; Gale reports settlement, refunds and disputes. You need both. Set your endpoint under Developer Tools → Webhooks in your Gale dashboard.One-time vs subscription
The session’smode decides which you get. Gale charges and settles the money either way — the difference is what Stripe keeps on its side.
- One-time —
mode: 'payment'. Stripe orchestrates a single charge, Gale collects it on the shopper’s HSA/FSA card, and Stripe records the outcome against the session. No Stripe subscription exists, and no Stripe Invoice is created automatically — listen forcheckout.session.completedif you need one. - Subscription —
mode: 'subscription'with a recurring Stripe price. Stripe creates a real subscription object and drives the billing schedule from there. See below.
setup mode is not available: a custom payment method can’t save a card without charging it.
Recurring billing on this path
mode: 'subscription' and Stripe creates a real subscription object. From then on:
- Stripe initiates every renewal — Gale takes the payment. Stripe holds the subscription and decides when a cycle is due. On each billing date it calls Gale off-session, and Gale charges the shopper’s stored HSA/FSA card and settles the money. Stripe never charges the card itself, on the first cycle or any renewal, and Gale does not schedule renewals on this path.
- Stripe cannot update the card. Stripe has no card-update mechanism for a custom payment method in any case — the Customer Portal can’t replace the card behind a Gale CPM subscription, and there’s no Stripe-side flow that can. Card updates go through Gale.
- Stripe’s record is for reconciliation. The charge outcome Stripe holds against the subscription is a reporting and reconciliation record of money Gale moved.
Renewals arrive on your existing Stripe webhooks
Because Stripe owns the subscription and initiates each cycle, a renewal on this path is an ordinary Stripe Billing event. Your existinginvoice.paid
and invoice.payment_failed handlers keep working, and there is nothing new to
subscribe to.
subscription.renewed or subscription.payment_failed
for a subscription on this path. Those come from Gale’s own renewal engine,
and a Stripe-scheduled subscription never enters it — so a Gale webhook
endpoint is optional here, where on the Stripe Payment
Elements
path it is the only way renewals reach you at all.Changing the card
Stripe has no card-update mechanism for a custom payment method, so card updates run through Gale:POST /v2/subscriptions/{id}/card-update-link. See
Subscriptions.
Refunding a cycle
You refund in Stripe, not in Gale. Stripe calls Gale’s adapter with a refund request, Gale returns the money on the shopper’s HSA/FSA card, and nothing is reported back — Stripe initiated it, so it already has the outcome. There is nothing for you to build. You do not callPOST /v2/refunds on this
path, and you do not need a Gale API key for it.
Test vs live
Everything on the Stripe side is mode-dependent — sandbox and live each need their owncpmt_ id, their own adapter URL registration, and their own signing
secret.
Outcomes you’ll see in Stripe
Stripe accepts four outcome codes for a custom payment method, and Gale maps refusals onto them:Test your integration
Use test credentials
cpmt_… you created. Test and
live are separate registrations.Confirm the option renders
cpmt_ in custom_payment_method_types, the preview API version or beta
flag is missing, the id belongs to the other mode, or Adaptive Pricing is in
play.Confirm Stripe reaches the adapter
Confirm the session completes
checkout.session.completed fires on your ordinary Stripe webhook. On
mode: 'subscription' a real Stripe Subscription and Invoice exist from this
point; on mode: 'payment' neither does.Run a mixed cart
Check the outcome codes
payment_method_customer_decline. See Outcomes you’ll see in
Stripe for the full set.Confirm the outcome server-side before fulfilling
Go-live checklist
- Live-mode
cpmt_…you created on the live code path — not the test registration - Adapter URL entered as the Checkout Sessions endpoint on the live custom payment method
- Live signing secret pasted into Gale, and the restricted key verified
- SKU metadata present on live products (or their Stripe product ids imported into Gale)
approval_methodis notmanual— Stripe does not support custom payment methods there- Outcome verified server-side before fulfilment
- One real live transaction reconciled in both the Stripe and Gale dashboards
- Team knows refunds are issued from Stripe on this path, and that disputes go through Gale
Related resources
Overview
Stripe Payment Elements
Gale on Stripe
cpmt_ id and signing secret.