> ## Documentation Index
> Fetch the complete documentation index at: https://docs.withgale.com/llms.txt
> Use this file to discover all available pages before exploring further.
# BigCommerce
This guide will walk you through installing and configuring Gale HSA/FSA Payments on your BigCommerce store.
***
## Prerequisites
Before starting, make sure you have access to:
* **BigCommerce Store**
* **Gale Merchant Dashboard**
***
## Installation Steps
1. In your bigcommerce admin panel Navigate to **Settings**
2. Scroll down to **API Section** > **Store-level API Accounts** > \*\*Create API Account. \*\*
 3. Select Token type : **V2/V3 API token**
1. Select the following scopes :
| Scope | Type |
| ------------------- | --------- |
| Content | Modify |
| Checkout Content | Modify |
| Checkouts | Modify |
| Metafield Ownership | Manage |
| Metafield Acess | Standard |
| Customers | Read Only |
| Orders | Modify |
| Products | Modify |
| Order Transactions | Read Only |
4. Click Save & Copy the generated API Credentials.
1. Login to **Gale Merchant Dashboard**
2. In Left Sidebar navigate to **Integrations** Page > **Bigcommerce**
3. Select Token type : **V2/V3 API token**
1. Select the following scopes :
| Scope | Type |
| ------------------- | --------- |
| Content | Modify |
| Checkout Content | Modify |
| Checkouts | Modify |
| Metafield Ownership | Manage |
| Metafield Acess | Standard |
| Customers | Read Only |
| Orders | Modify |
| Products | Modify |
| Order Transactions | Read Only |
4. Click Save & Copy the generated API Credentials.
1. Login to **Gale Merchant Dashboard**
2. In Left Sidebar navigate to **Integrations** Page > **Bigcommerce**
 3. Enter **Store Hash and Access Token** generated in previous step and hit **Connect**.
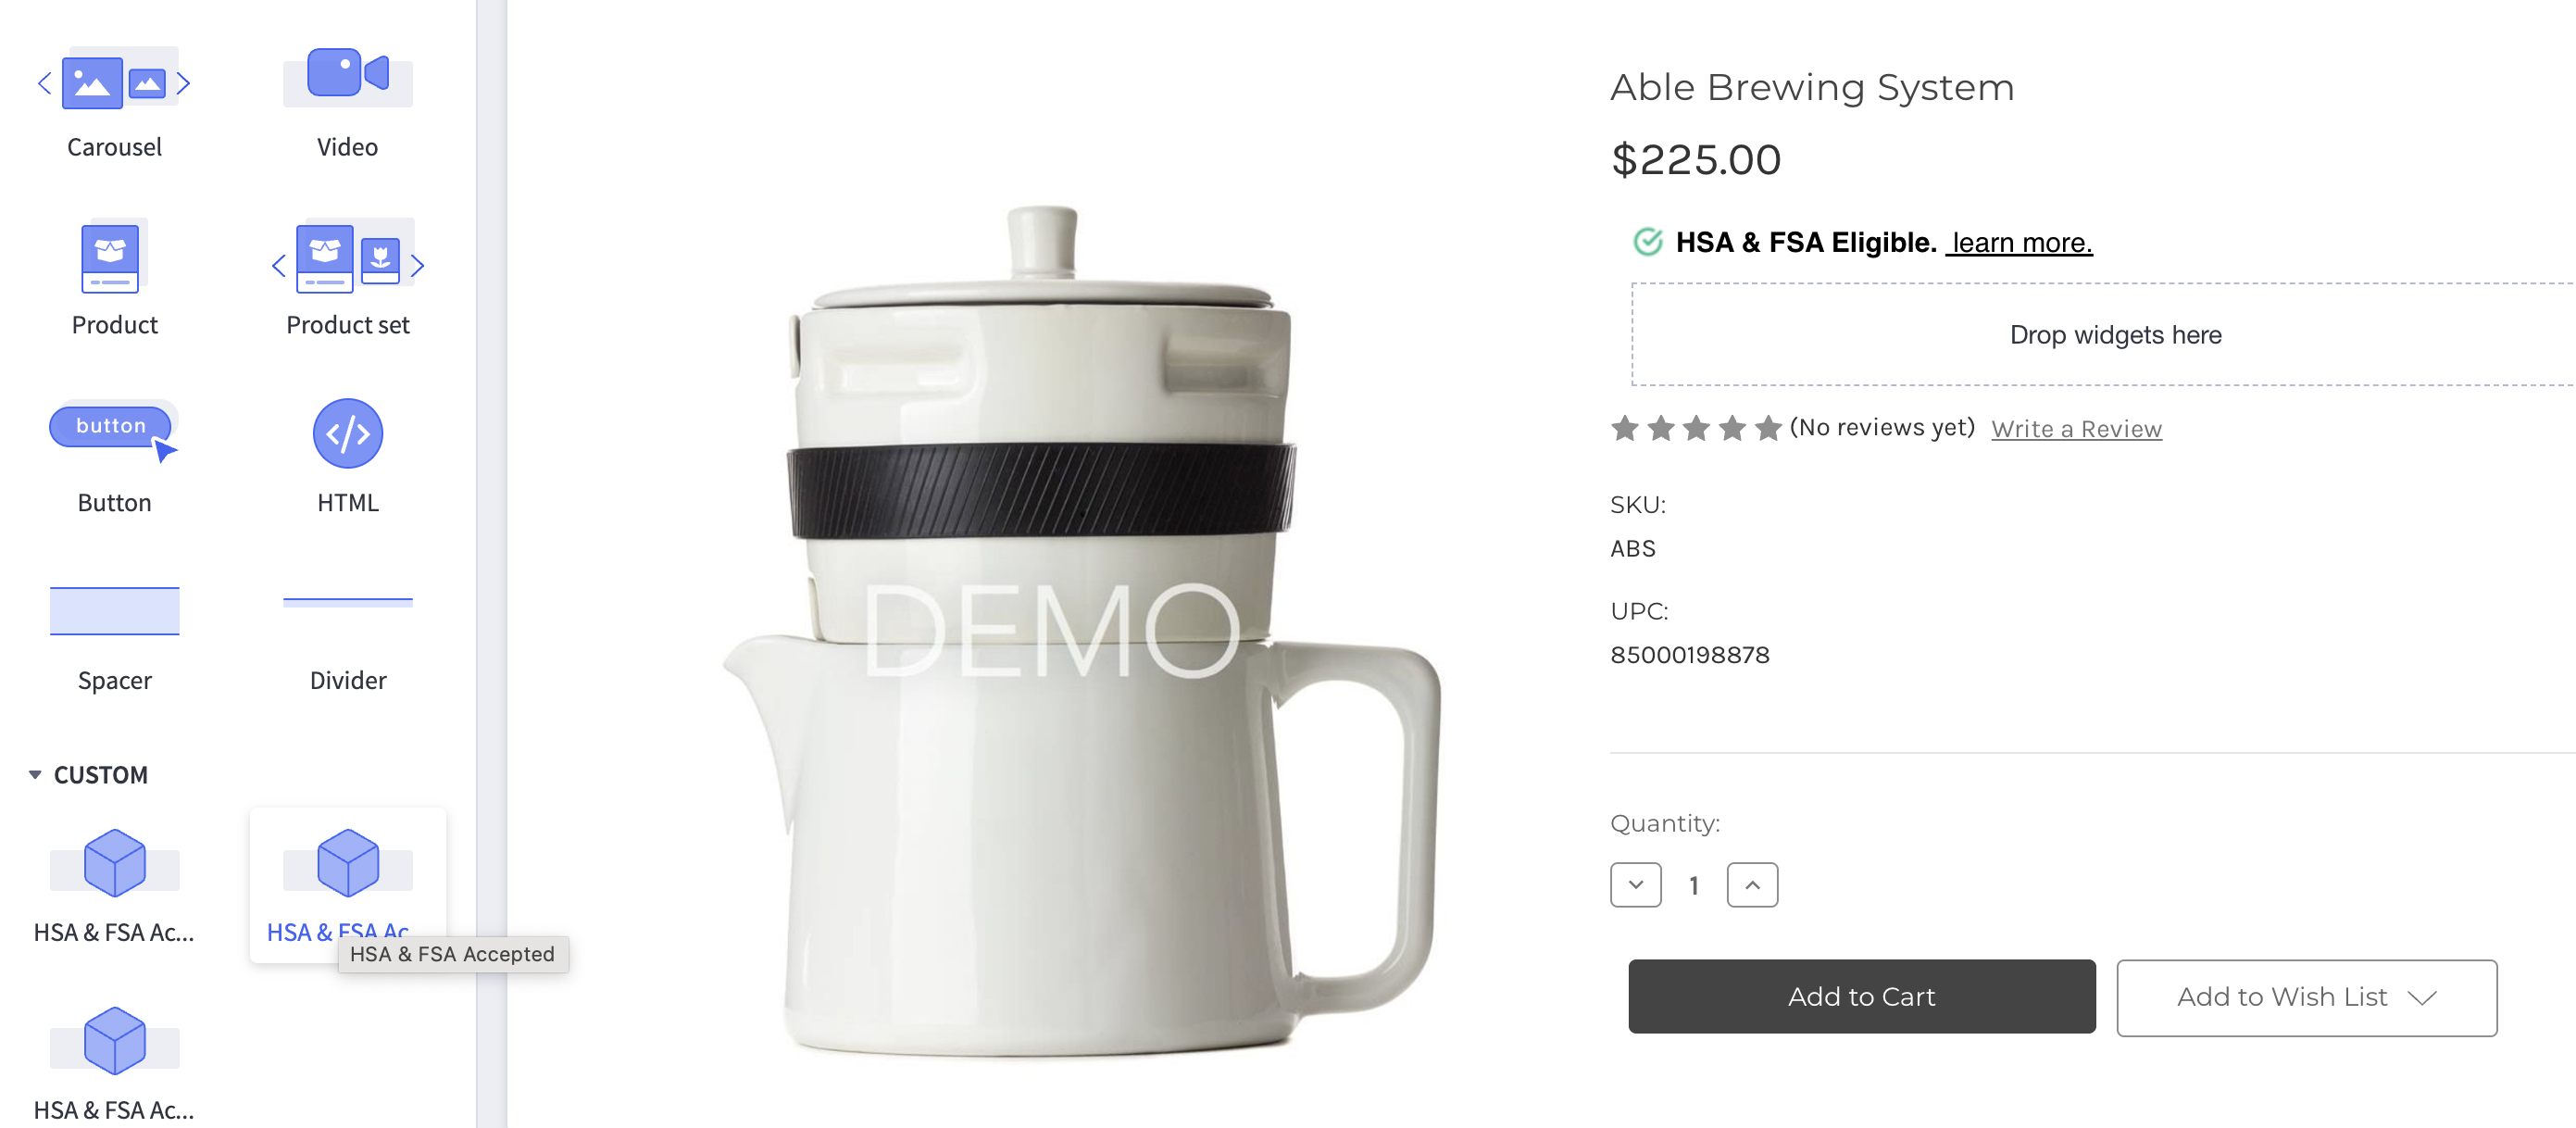
1. Go to **Storefront → Page Builder**.
2. Look for the **HSA & FSA Accepted** widget.
3. Drag and drop it onto any product page.
4. Click **Publish** to make it live.
3. Enter **Store Hash and Access Token** generated in previous step and hit **Connect**.
1. Go to **Storefront → Page Builder**.
2. Look for the **HSA & FSA Accepted** widget.
3. Drag and drop it onto any product page.
4. Click **Publish** to make it live.
 1. Go to your storefront and add a synced product to the cart.
2. Proceed to checkout and select **Gale HSA & FSA Payment**.
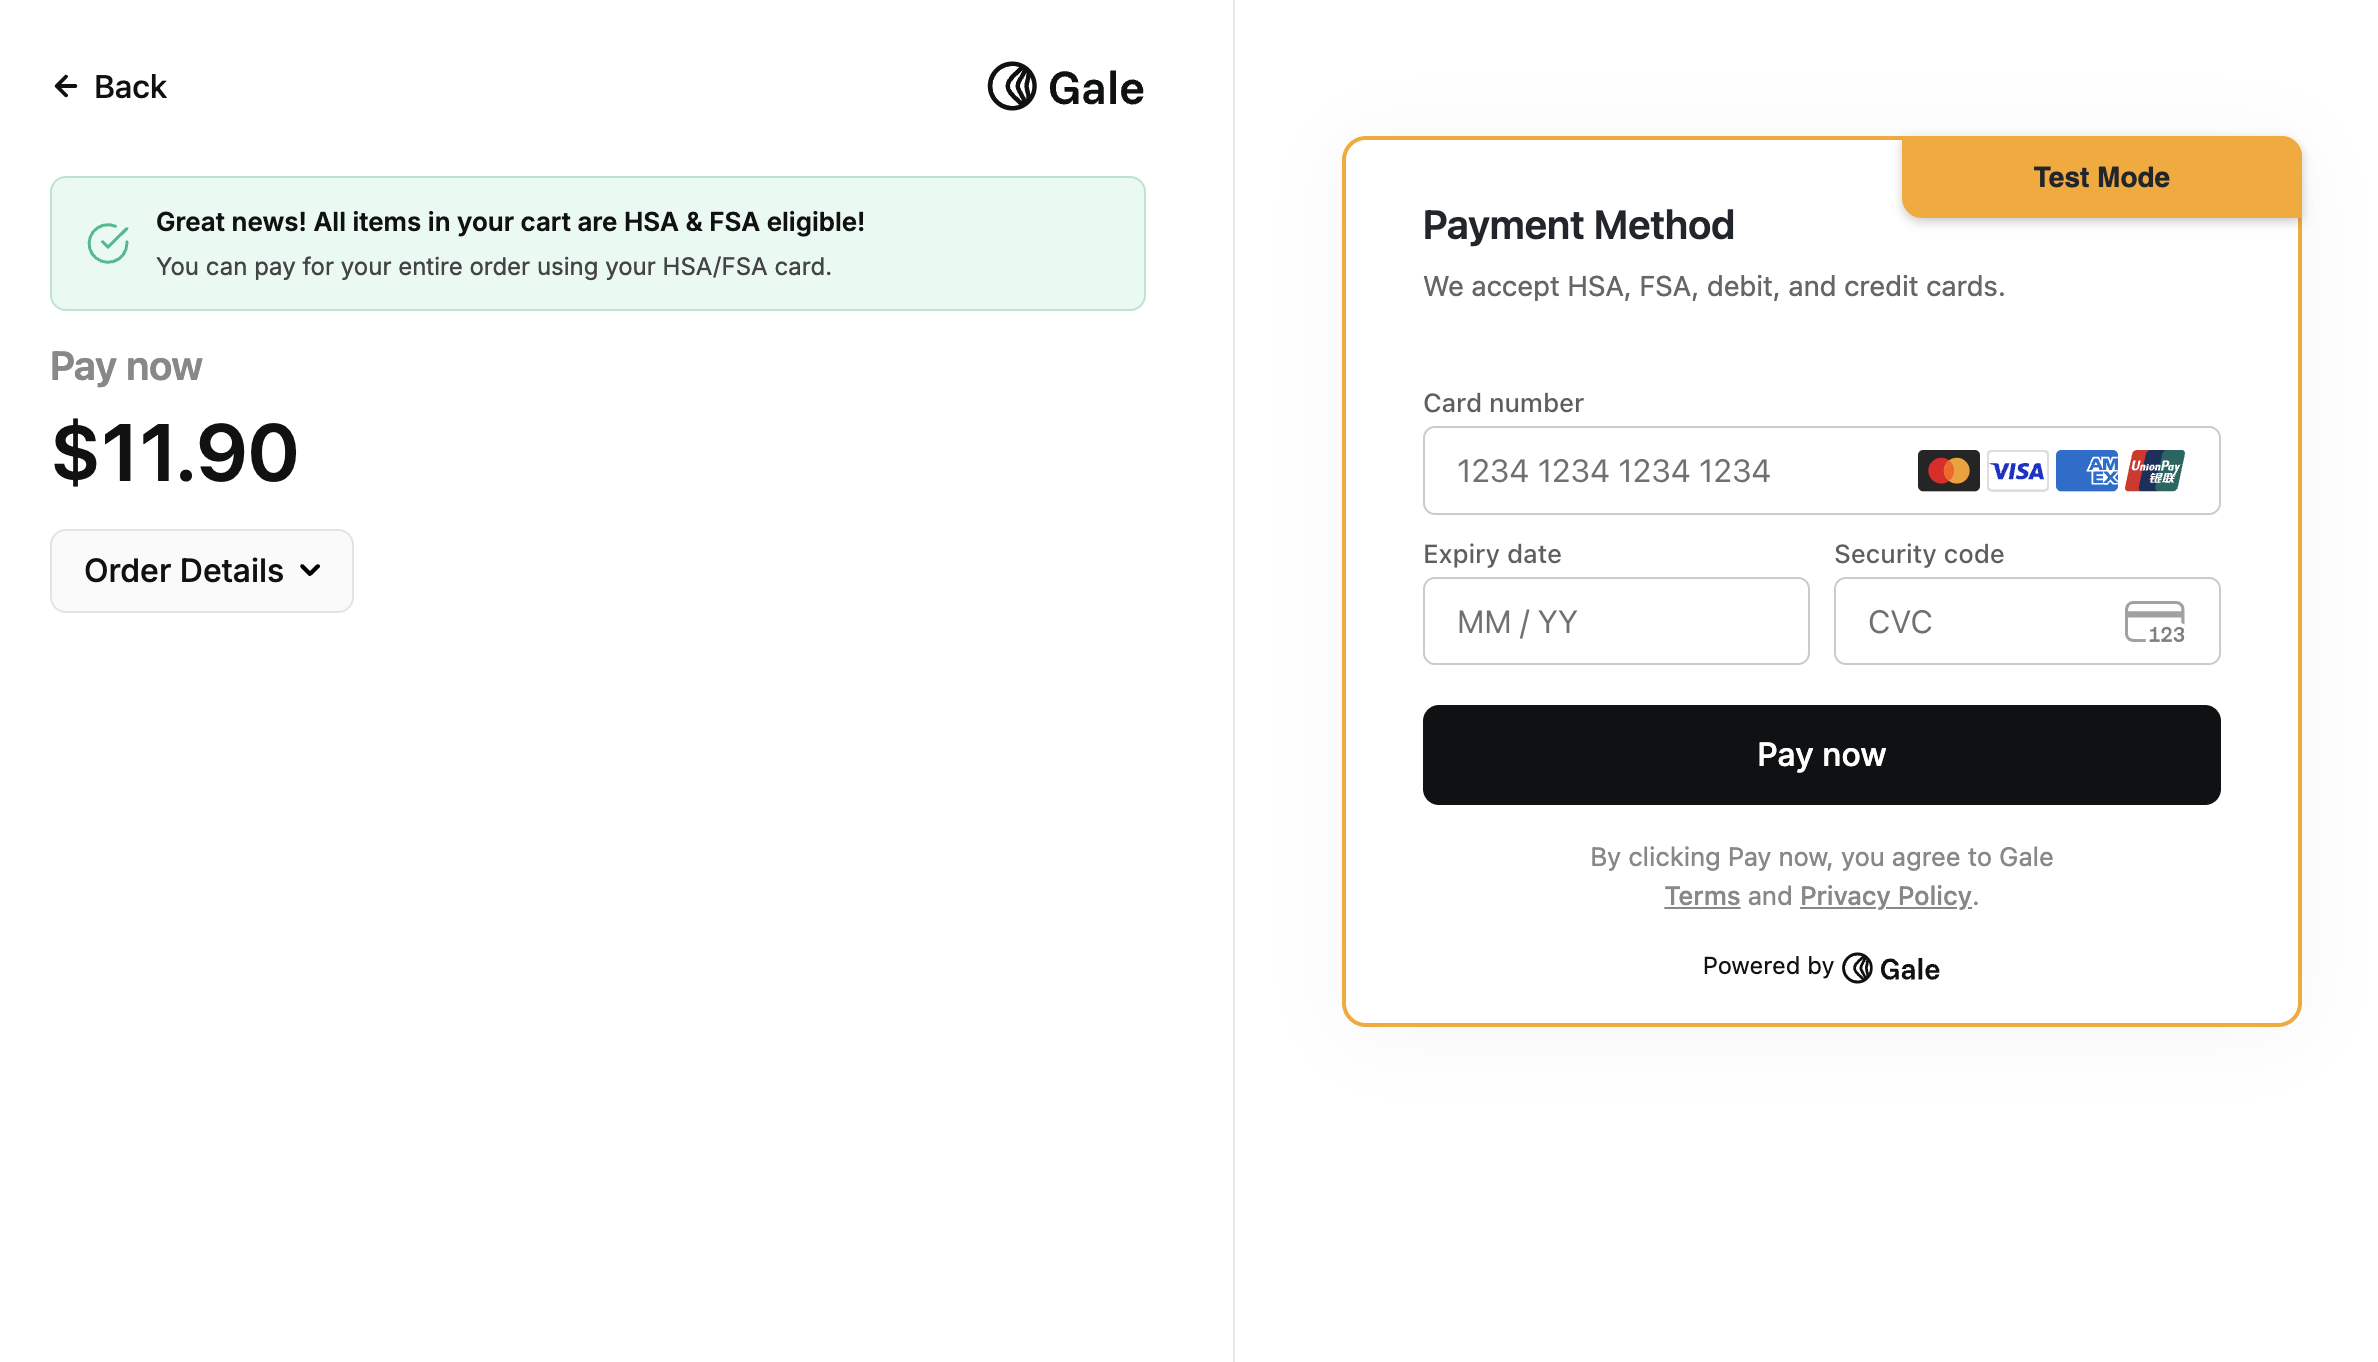
3. You will be redirected to a secure hosted Gale checkout page.
4. Use the test cards to complete payment (Only works if Test Mode is Enabled).
5. After payment, you’ll be redirected back to your store’s order confirmation page.
1. Go to your storefront and add a synced product to the cart.
2. Proceed to checkout and select **Gale HSA & FSA Payment**.
3. You will be redirected to a secure hosted Gale checkout page.
4. Use the test cards to complete payment (Only works if Test Mode is Enabled).
5. After payment, you’ll be redirected back to your store’s order confirmation page.
 ***
## Resources
Use these cards only during testing mode.
***
***
## Need Help?
If you have questions or need assistance, reach out to us at [support@withgale.com](mailto:support@withgale.com). We're happy to help!
***
## Resources
Use these cards only during testing mode.
***
***
## Need Help?
If you have questions or need assistance, reach out to us at [support@withgale.com](mailto:support@withgale.com). We're happy to help!