> ## Documentation Index
> Fetch the complete documentation index at: https://docs.withgale.com/llms.txt
> Use this file to discover all available pages before exploring further.
# Payment Links
> Learn how to create one-time and recurring payment links from the Gale Dashboard.
## Overview
Payment Links allow you to quickly generate a hosted checkout link from the Gale Dashboard. These links can be shared with customers to accept one-time payments or recurring subscription payments.
This guide walks you through:
* Creating a **one-time** payment link
* Creating a **recurring / subscription** payment link
***
## Prerequisites
Before creating a payment link, make sure the following requirements are met:
1. **You must have access to the Gale Dashboard.**
2. **Products Available in Gale**
* At least one product must be **synced** from your store\
**OR**
* A product must be **manually created** from the Gale Dashboard
***
## Creating a One-Time Payment Link
Follow these steps to create a one-time payment link:
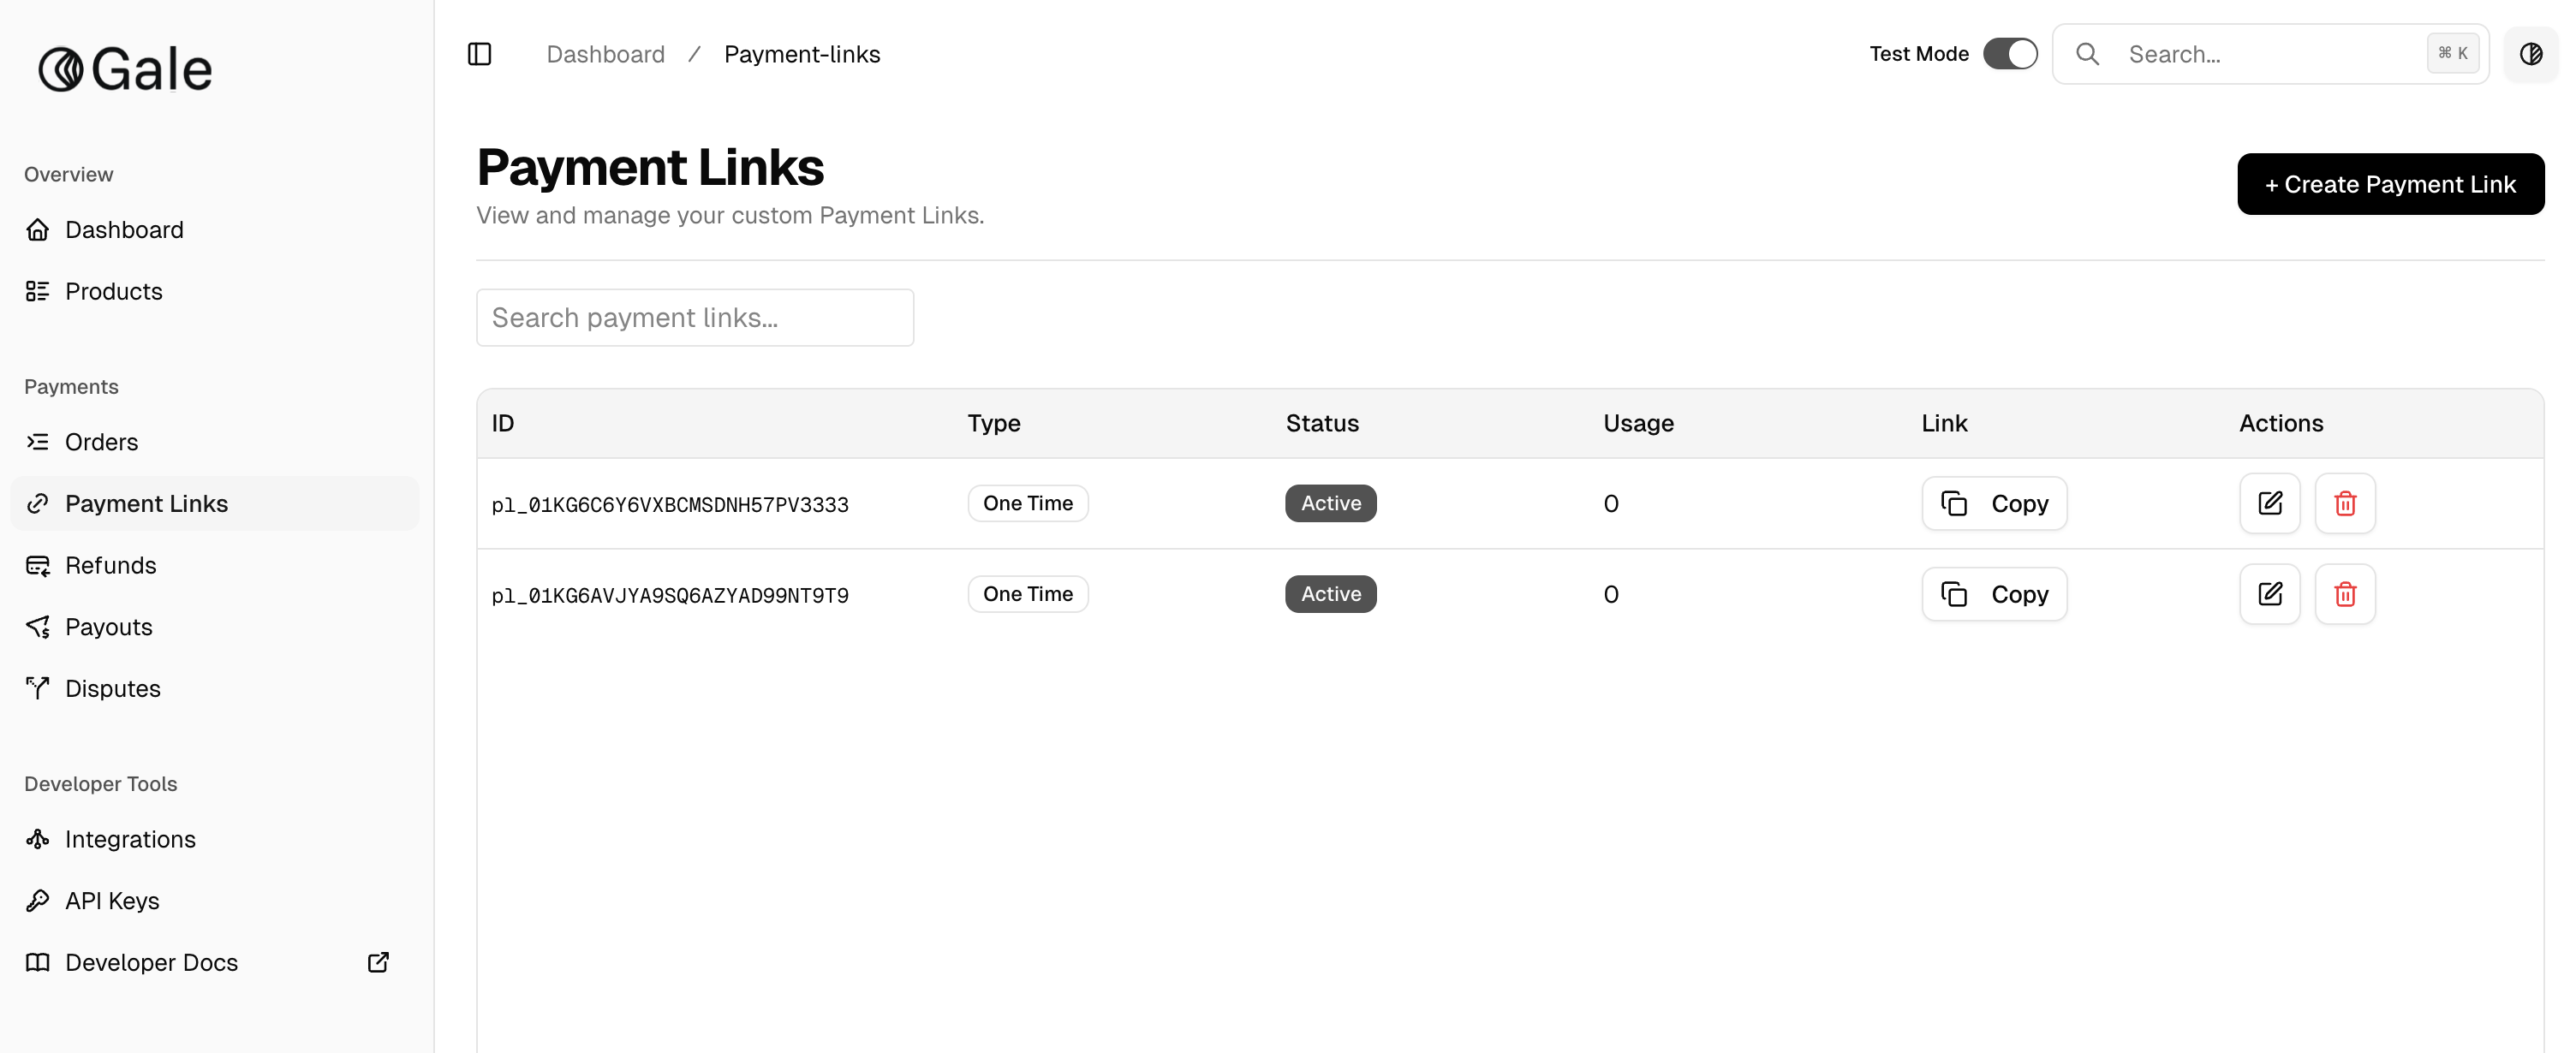
### Step 1: Navigate to Payment Links
* Log in to the **Gale Dashboard**
* Go to **Payment Links**
* Click **Create Payment Link**
 ***
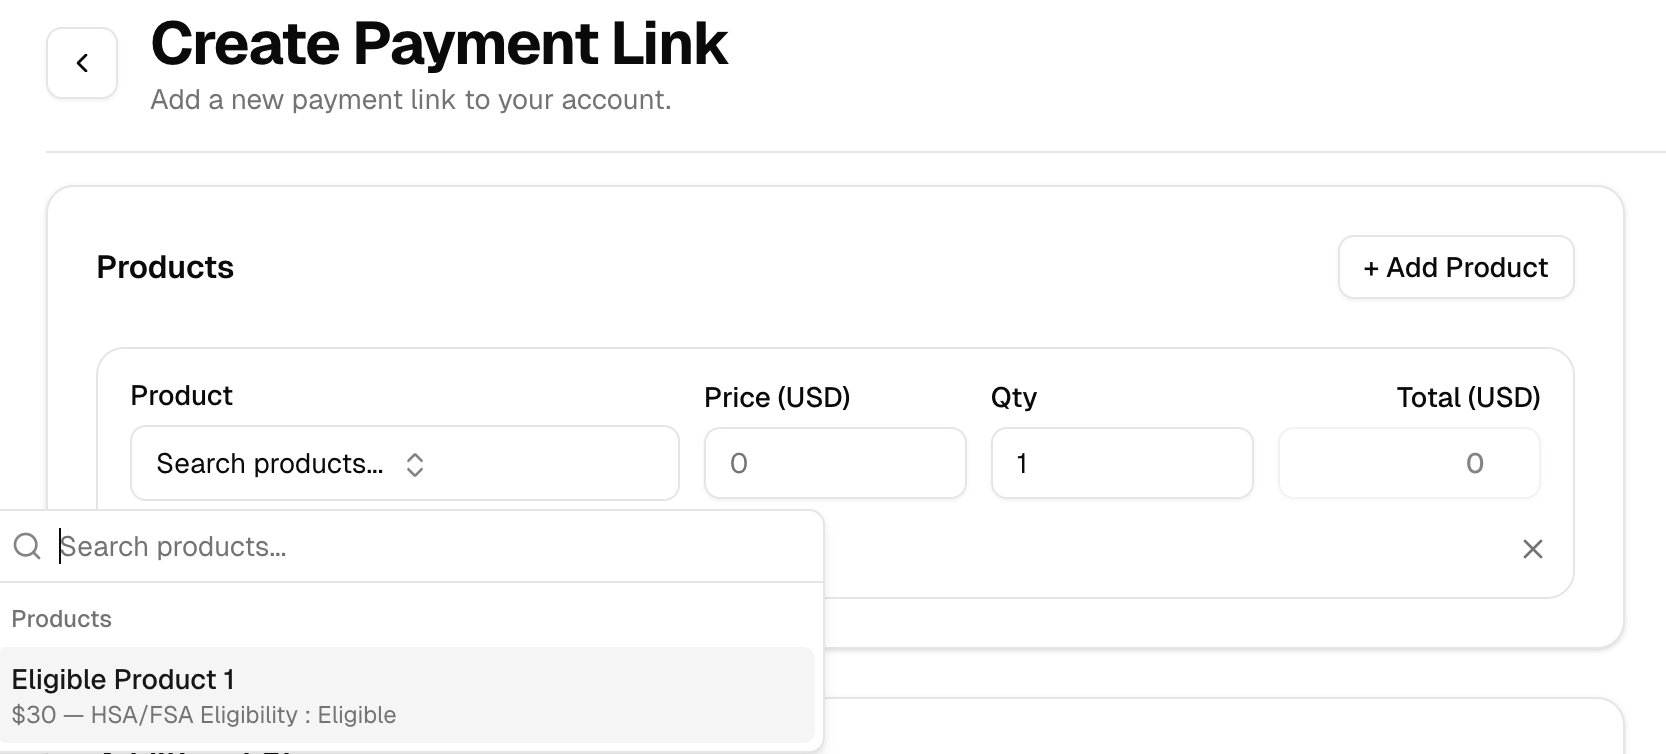
### Step 2: Select a Product
* In the **Products** section, choose a product from the dropdown
* This product will be charged when the payment link is used
***
### Step 2: Select a Product
* In the **Products** section, choose a product from the dropdown
* This product will be charged when the payment link is used
 ***
### Step 3: Configure Additional Charges (Optional)
In the **Additional Charges** section, you can optionally add:
* **Shipping (Flat Fee)**
* **Discount**
* **Tax Percentage**
***
### Step 3: Configure Additional Charges (Optional)
In the **Additional Charges** section, you can optionally add:
* **Shipping (Flat Fee)**
* **Discount**
* **Tax Percentage** 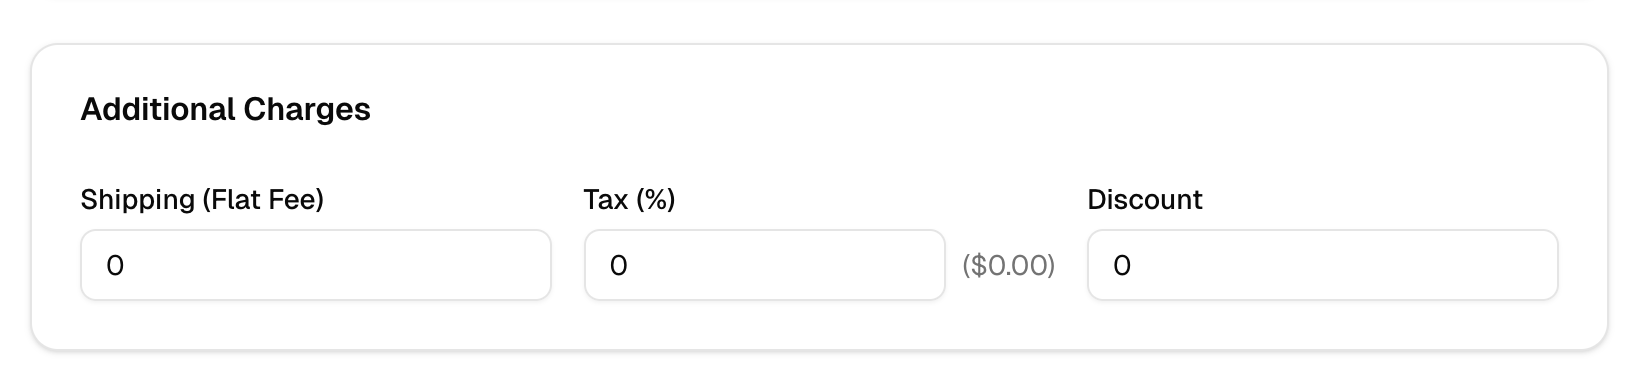 These fields are optional and can be left empty if not required.
***
### Step 4: Add Multiple Shipping Rates (Optional)
If you want to offer multiple shipping options:
* Add multiple entries under the **Shipping Rates** section
* Each rate can have its own label and amount
These fields are optional and can be left empty if not required.
***
### Step 4: Add Multiple Shipping Rates (Optional)
If you want to offer multiple shipping options:
* Add multiple entries under the **Shipping Rates** section
* Each rate can have its own label and amount 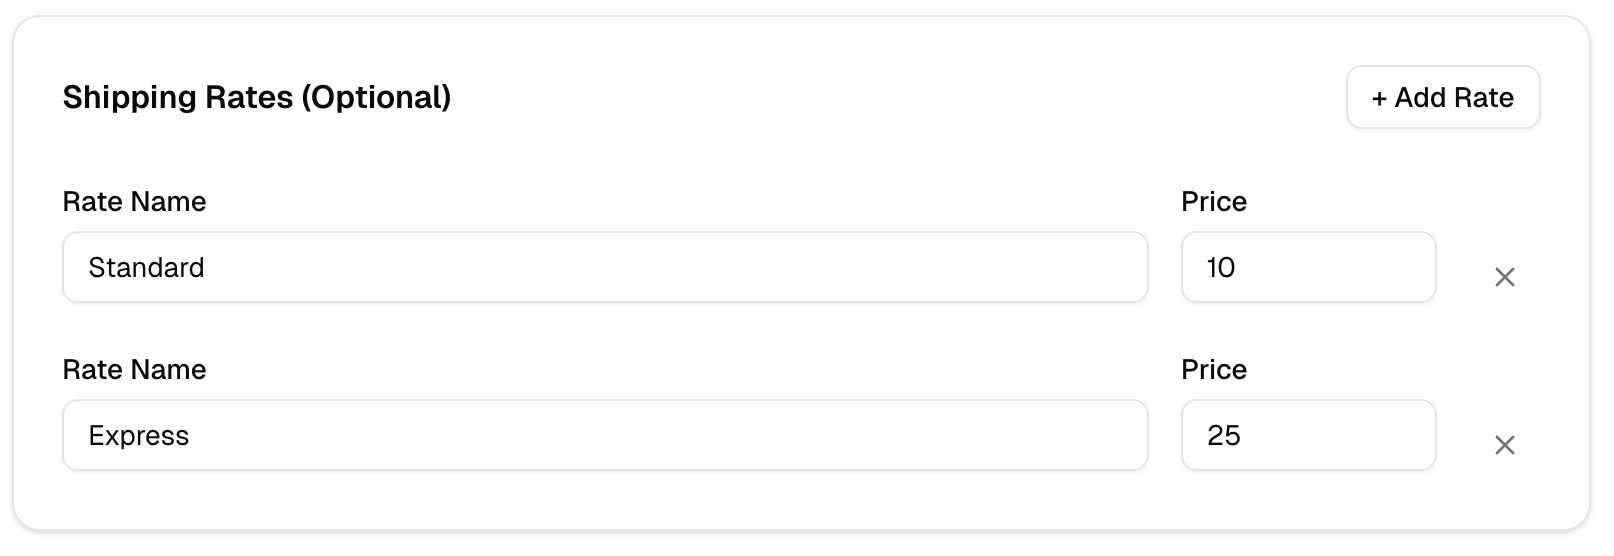 ***
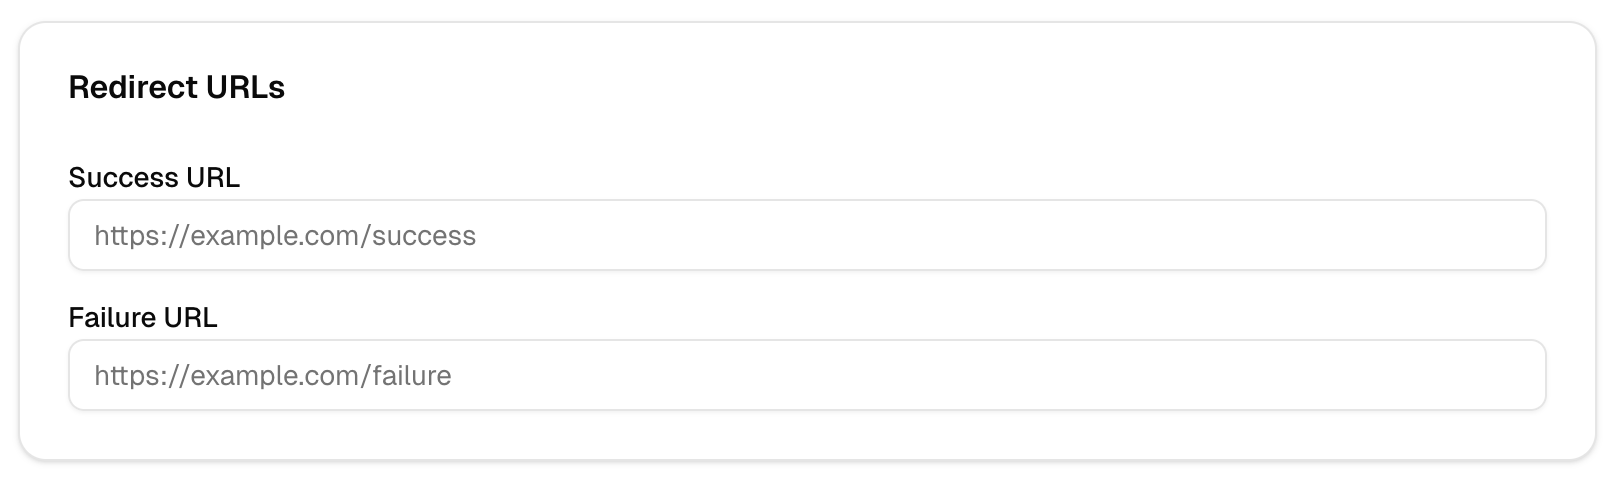
### Step 5: Configure Redirect URLs
In the **Redirect URLs** section:
* Enter a **Success URL**\
→ Customer is redirected here after a successful payment
* Enter a **Failure URL**\
→ Customer is redirected here if the payment fails or is canceled
***
### Step 5: Configure Redirect URLs
In the **Redirect URLs** section:
* Enter a **Success URL**\
→ Customer is redirected here after a successful payment
* Enter a **Failure URL**\
→ Customer is redirected here if the payment fails or is canceled
 ***
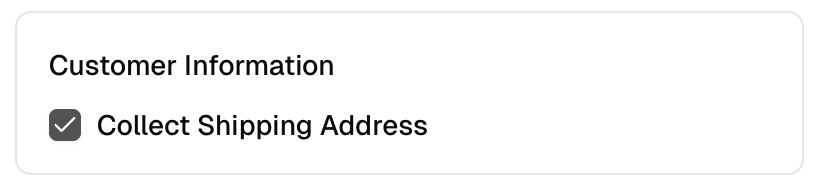
### Step 6: Collect Shipping Information (Optional)
* If you need to collect shipping details from the customer, make sure the **Collect Shipping Information** checkbox is checked
***
### Step 6: Collect Shipping Information (Optional)
* If you need to collect shipping details from the customer, make sure the **Collect Shipping Information** checkbox is checked
 ***
### Step 7: Create the Payment Link
* Review all details
***
### Step 7: Create the Payment Link
* Review all details 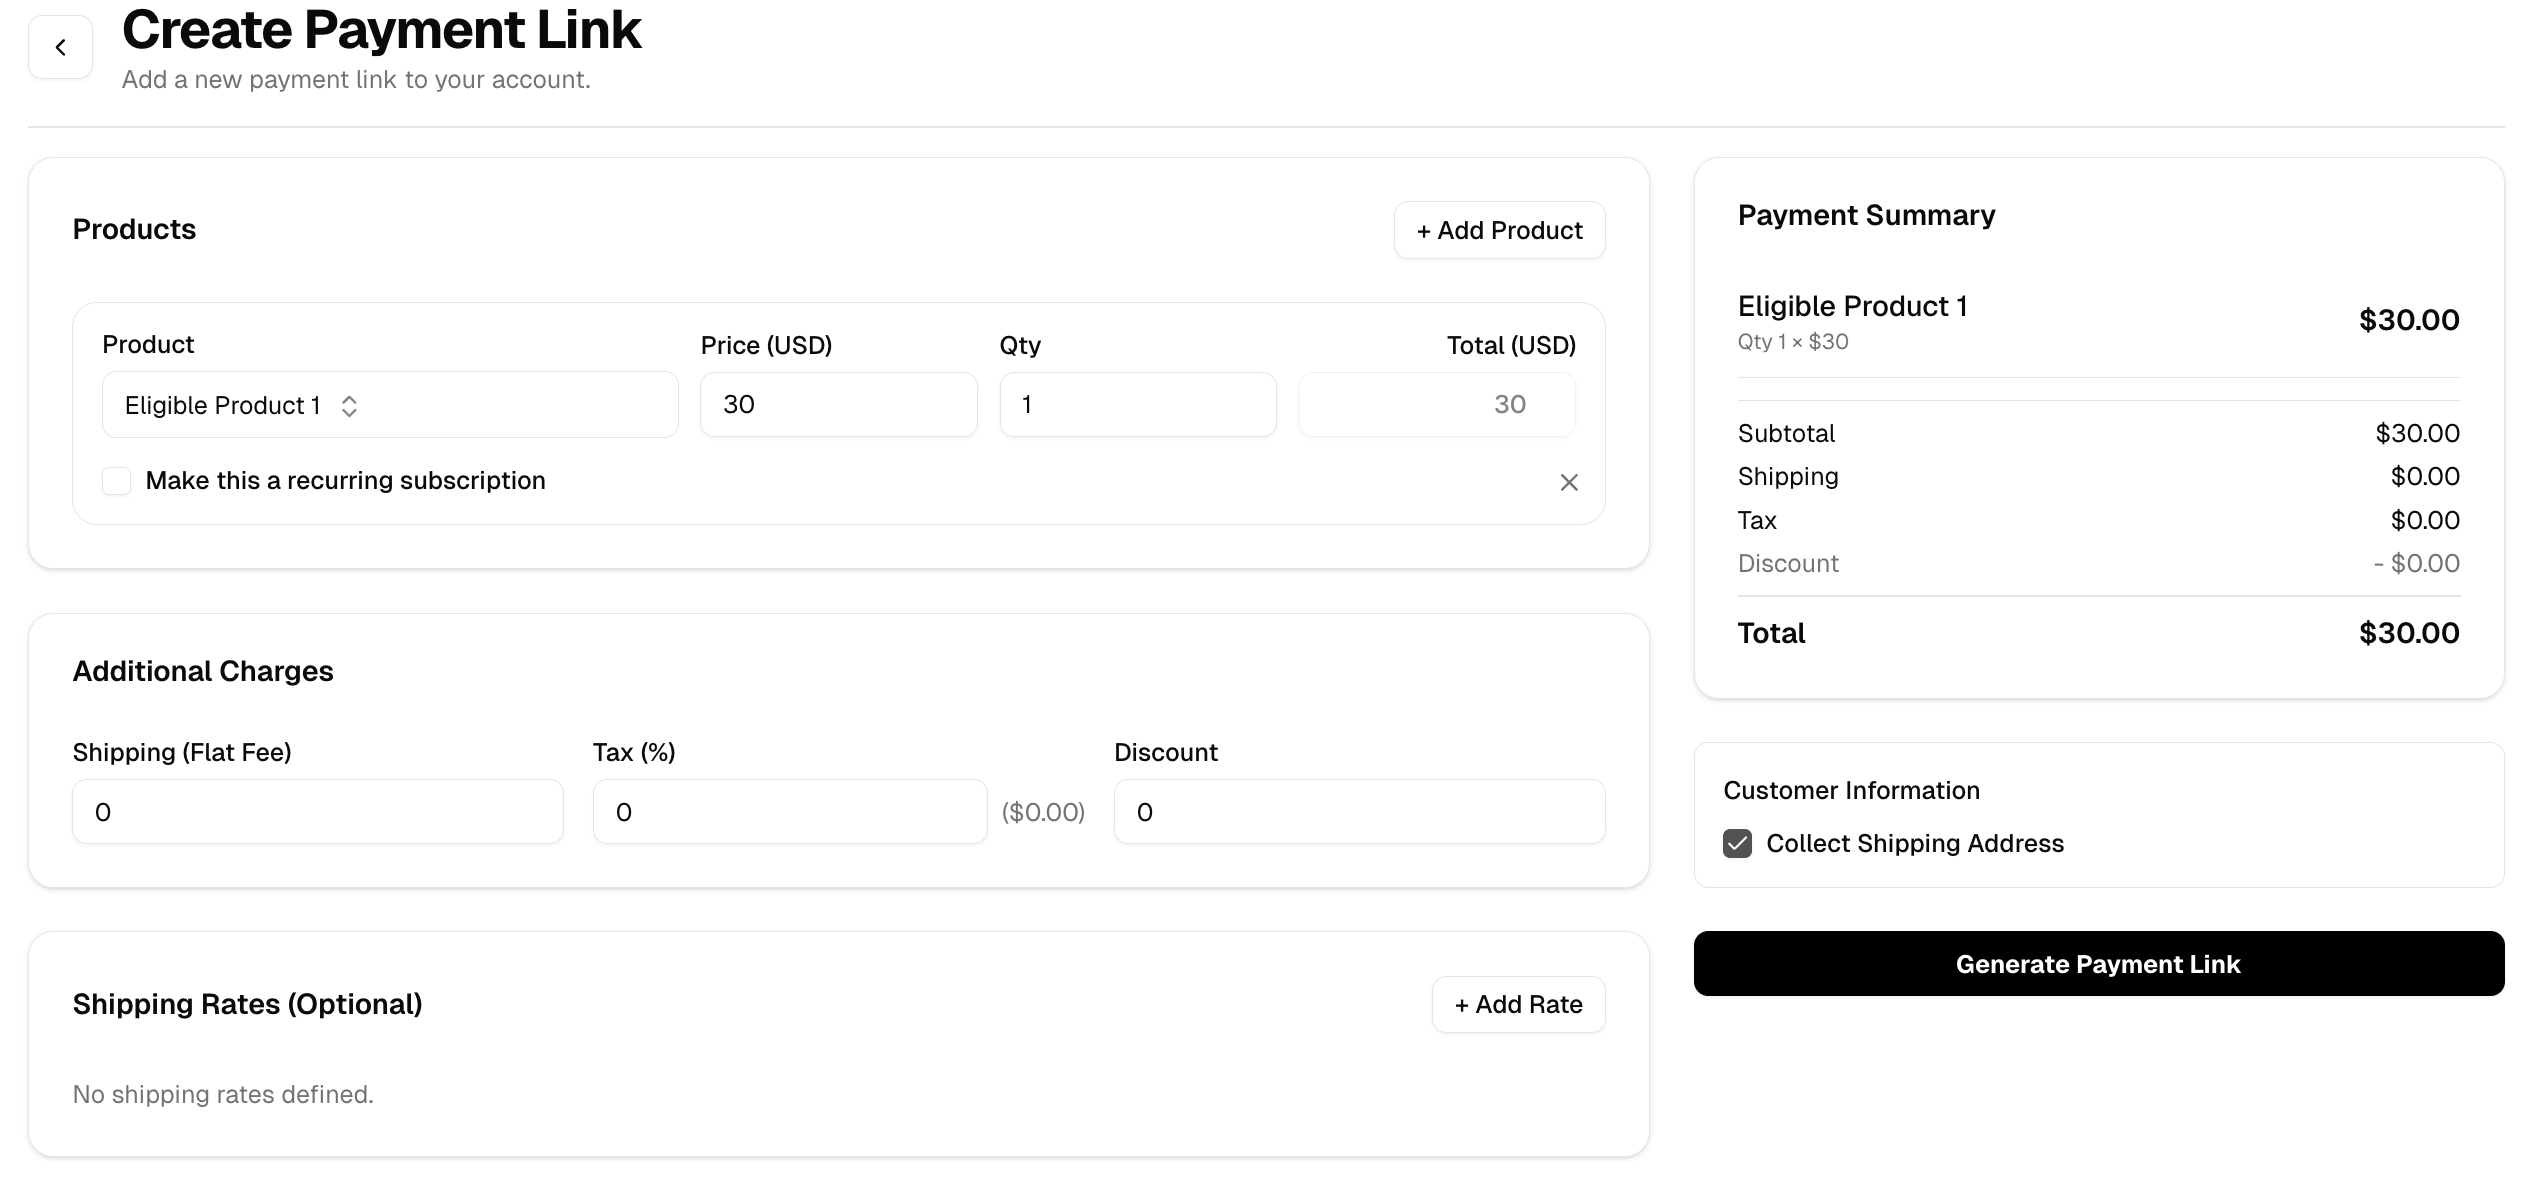 * Click **Create Payment Link**
* Copy and share the generated payment link with your customer
### Step 8: Client Reference ID (optional)
You can simplify reconciliation by appending a `client_reference_id` query parameter to any payment link URL. This is entirely optional — payment links work the same with or without it. When provided, it allows you to associate a payment with a record in your own system, such as a customer ID, order ID, or cart ID.
**How it works**
After creating a payment link, you can optionally append `client_reference_id` as a query string parameter to the URL:
```text theme={null}
https://checkout.withgale.com/payment/pl_M5CS4Y2?client_reference_id={customer_id}
```
If a `client_reference_id` is included:
* It will be passed along in the webhook events you receive for that payment.
* You can also retrieve the payment status using the `client_reference_id` directly via the API.
If omitted, the payment link functions normally without any impact.
| Requirements | **Description** |
| --------------------- | ----------------------------------------------------------------------------------------------------------------------------------------------------------------------------------------- |
| `client_reference_id` | An optional unique string to associate the payment with your internal systems.
* Click **Create Payment Link**
* Copy and share the generated payment link with your customer
### Step 8: Client Reference ID (optional)
You can simplify reconciliation by appending a `client_reference_id` query parameter to any payment link URL. This is entirely optional — payment links work the same with or without it. When provided, it allows you to associate a payment with a record in your own system, such as a customer ID, order ID, or cart ID.
**How it works**
After creating a payment link, you can optionally append `client_reference_id` as a query string parameter to the URL:
```text theme={null}
https://checkout.withgale.com/payment/pl_M5CS4Y2?client_reference_id={customer_id}
```
If a `client_reference_id` is included:
* It will be passed along in the webhook events you receive for that payment.
* You can also retrieve the payment status using the `client_reference_id` directly via the API.
If omitted, the payment link functions normally without any impact.
| Requirements | **Description** |
| --------------------- | ----------------------------------------------------------------------------------------------------------------------------------------------------------------------------------------- |
| `client_reference_id` | An optional unique string to associate the payment with your internal systems.
Must be composed of alphanumeric characters, dashes, or underscores, up to 200 characters in length. |
***
## Creating a Recurring / Subscription Payment Link
The process for creating a **recurring (subscription)** payment link is almost identical to a one-time payment link, with one additional step during product selection.
### Follow Steps 1–4 Above
* Navigate to **Payment Links**
* Click **Create Payment Link**
* Select a product
* Configure optional charges (shipping, discount, tax)
***
### Enable Recurring Subscription
When selecting a product:
1. Enable **Make this a recurring subscription**
2. Choose a **Subscription Interval** (e.g. weekly, monthly, yearly) 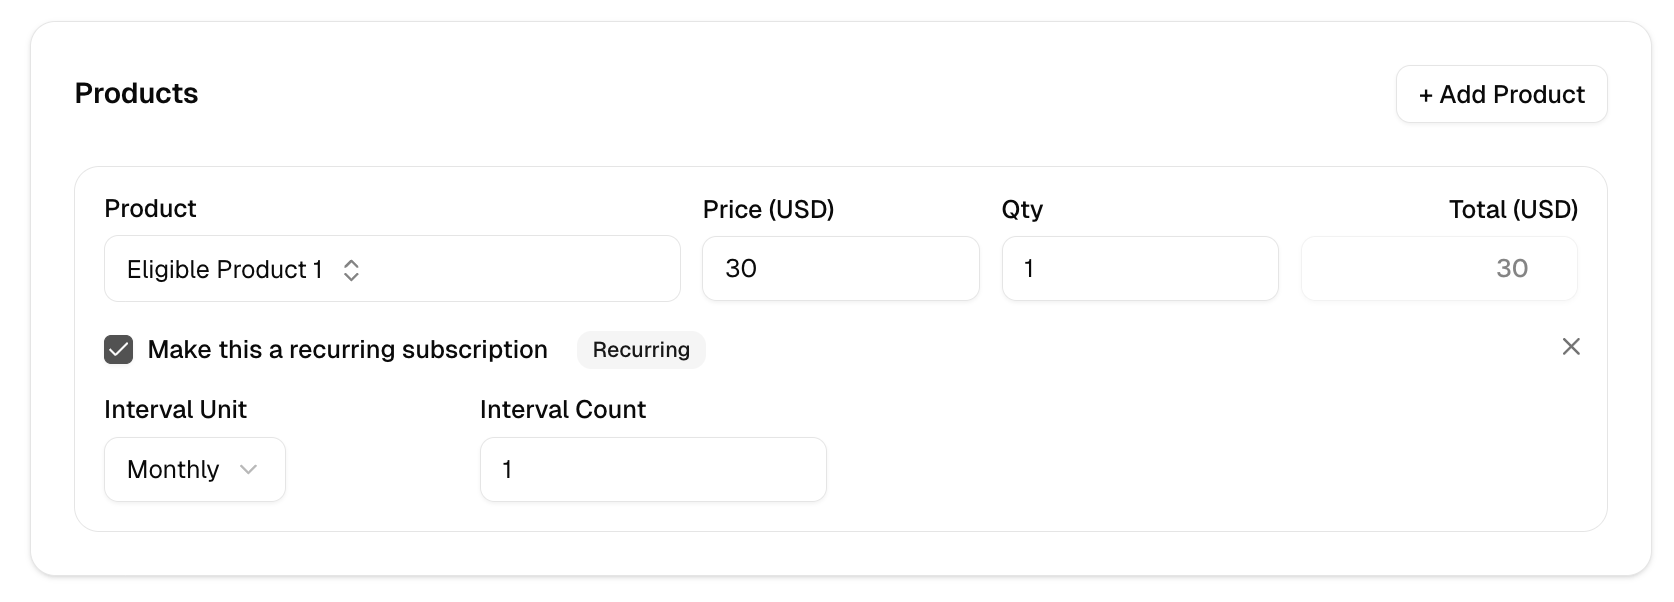 ***
### Complete Remaining Steps
* Configure **Redirect URLs**
* Enable **Collect Shipping Information** if required
* Click **Create Payment Link**
The generated link will now charge customers on a recurring basis according to the selected interval.
***
## Notes & Best Practices
* Ensure redirect URLs are valid and publicly accessible
* Use different payment links for different pricing or subscription intervals
* Test payment links in a test environment before sharing with customers
***
If you have any questions or need help setting up payment links, reach out to the Gale support team.
***
### Complete Remaining Steps
* Configure **Redirect URLs**
* Enable **Collect Shipping Information** if required
* Click **Create Payment Link**
The generated link will now charge customers on a recurring basis according to the selected interval.
***
## Notes & Best Practices
* Ensure redirect URLs are valid and publicly accessible
* Use different payment links for different pricing or subscription intervals
* Test payment links in a test environment before sharing with customers
***
If you have any questions or need help setting up payment links, reach out to the Gale support team.